Saturday, April 17, 2010

Kitchen Essentials: Kanthne - Coconut Scraper for grating coconut

Coconut is used very heavily in Manglorean cooking. I think grandma used to use up over 6-8 coconuts a day when the whole family was over for meals. Mum still uses about 4-5 a day when we are all at home and she wants to cook Manglorean food for us.

Most Manglorean food, needing coconut, needs it to be grated: whether it will be used as it is, ground into a masala paste or if the milk has to be extracted, the coconut needs to be grated first.

The only city I have ever been able to buy freshly grated coconut is Bombay. Its easy to make do with frozen coconut, but the taste is obviously way beter if you are using fresh coconut.

When living in Egypt, there was a time when all the coocnuts arriving in the market were rotten. At that time, I did substitute dessicated coconut, by soaking it in a few tsps of milk first.

If coconut oil is not available, you can get a hint of the flavour by roasting dessicated coconut in a non-stongly flavored cooking oil.

But nothing, can beat the taste of a freshly grated cooconut.

The traditional Manglorean implement for grating the coconut is the "kanthne".
It is a short stool with a serrated blade attached at the end.

The person doing the grating has to sit astride the kanthne with the serrated blade in front of them.
Using several practiced movements, the flesh is scraped away from the shell.

The curve of the blade ensures that you get every bit of flesh away from the curved shell.

That's how much flesh you can get out of half a coconut.
I don't like the last dry bits of the edges as they add a brownish color to the dishes, and are dryer in texture thats why there is still a few slivers of flesh left inside the shell.

Voila - the freshly grated coconut!

As I mentioned at the beginning, this grated coconut can be used directly in dishes and desserts. It can be ground for masalas, coconut milk can be extracted out of it.

A few teaspoons of this normally does end up in my mouth. I love the taste of fresh coconut. Slip a little sugar into it or some pieces of jaggery and its an instant pick me up.

When the maids used to grate coconuts in grandma's house or if I could manage to let them allow me to do the grating myself (the blade is very sharp and grandma didn't like the "children" anywhere near the blade,) I always popped a few teaspoons into my mouth. But nana being nana always knew if any flesh was missing from the plate (she also knew if any mangoes were missing from the trees!). She used to give me an old Manglorean warning which said that yeh tuve kelyaar, tujha rosachya disak paus yetale puta if you eat the grated coconut which is meant for cooking, it will rain on the day of your roce (Manglorean ceremony held the day before the wedding)

I think it did drizzle before my roce!

Kitchen Essentials: Koithi - Sickle

A koithi was always a must,  in every Mangalorean house.

It is used in the fields and farms to cut grass, on the estate when taking a walk, to break away branches from coffee shrubs that had grown too long, to cut off fruits from the trees without damaging the stems or the fruit. But it was also used within the house.


I have seen women practiced in the art, actually grip the koithi handle between their big and second toes and clean fish with the curved blade and chop vegetables. No need for an adalo, just the koithi would do.

With the introduction of better quality knives, the koithi is slowly being eased out of Manglorean kitchens.

While I personally do not use it to chop vegetables, I definitely need it when I'm cooking with coconuts.

The sharp tip is used to clean up the fibre on the exterior of the coconut. Then using the back of the curved part of the koithi, you hit the coconut hard around its mid section, until the shell cracks.

Using the sharp tip of the koithi,seperate the two halves of the coconut, keeping a bowl or a glass handy to collect the water inside the coconut (which is not as tasty as tender coconut water/ bonda neeru, but its quite drinkable too - very cooling and high in Potassium - so good for rehydration)

This entire process is normally completed on the edge of the kitchen sink to reduce the clean up of the coconut fibres and in case any water spills out of the coconut.

Sunday, April 11, 2010

Recipe : Egg Pulao

We were out of town for the Easter Weekend in Haridwar, where even eggs aren't sold or consumed. Haridwar is one of the Holiest towns in Hinduism with the Holy Ganges flowing through it. For the last few moons, the Kumbh Mela (once in 12 years) has been on at Haridwar and my husband and I really wanted to catch the event before it ends in Mid April.

We drove back on Sunday evening and after the extended vegetarian diet, I really wanted to eat something celebratory and non-vegetarian. Reaching home at 10:30pm, there was no time to defrost meat, so eggs were the fastest option. Plus with it being Easter, eggs seemed like a good choice. But instead of an elaborate dinner like mum had cooked back home, I wanted a one dish meal that I could quickly put together, with time to take a bath before dinner.


Ingredients:
4 eggs
2 cups of rice
1 lime
salt to taste

Masala for Grinding :
1 onion
4-5 green chillies
1" ginger
1/2 pod garlic
1 tsp saunf/ fennel seeds
1" cinnamon
2-3 cloves
1-2 cardamom pods.

Method:
Boil the eggs in a pan.
Wash and Soak the rice in water

Clean the cuttings and grind all the masala ingredients together (I used the chopper and chopped everything as fine as it could get)

In a pressure cooker, warm a teaspoon of oil, add the masala and fry till cooked (onion takes time to cook, when ground).


While the masala is frying, shell the eggs (if you immerse eggs in cold water as soon as you take them off the fire and repeat till the water runs cold, the shells will fall apart very easily)

To the fried masala, add the rice, mix well and fry some more.(2-3 minutes)

Add 4 cups water (twice the quantity of rice) and juice of the lemon and salt to taste.
Add the shelled boiled eggs.
Close the cooker and cook till done.
While waiting for the cooker to whistle, make the raita and put it back in the fridge.

While waiting for the pressure to settle (after turning the cooker off) take a quick shower.

Tip: Never force the pressure to escape after cooking rice in a pressure cooker, it will cause a complete mess in the water proportions of the dish

Serve hot with chilled raita - onion+ chilli or boondi or cucumber.

You can garnish with crisply fried onions and fresh chopped corriander (I had emptied the fridge before travelling, so no corriander)

Saturday, April 10, 2010

Recipe : Charmuri / Jhalmuri - Puffed Rice snack

Charmuri is a snack from Mangalore. One of the few indigineous beachside snacks of this city. Indigenous in that I remember it from my childhood visits to the beach before pan-Indian food became available all over India.

In the early days, the vendor used to serve this snack in a newspaper cone and later on they started serving it in small sized brown paper bags. I haven't seen them on the beach, on my recent visits to town, if any Manglorean knows which beach these guys are hiding out at, do let me know :)

Charmuri tasted best when green mangoes were in season, because they added texture and flavour to the snack. Off season, the vendors used lemon juice. I was lucky to find some green mangoes in the market the other day, so the dish was just begging to be made.

Manglorean charmuri is different from Bengali jhalmuri although the major ingredient is the same. - Puffed Rice / muri / laiyya / murmura.

Mustard oil is key to the taste of this dish. You can make it with refined oil but it will lack the bite that mustard oil provides.

Since this is a street snack. Quantities are really based on personal preference. My measurements are just to give you a rough idea. Play around with them as you like.

Ingredients:

1.5 bowls of Puffed Rice / muri / laiyya / murmura / unsweetened rice crispies.
1 small onion chopped fine
1 green chilli chopped fine
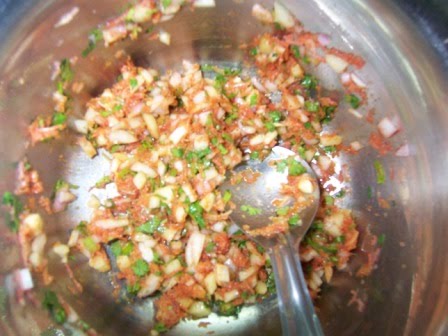
1 small carrot grated fine (a cheese grater is best for the size required. Also grate it across horizintally rather than across the length, so you get shorter thinner strands than normal)
1 green mango grated fine (I skinned it before using, but the choice is yours)/ juice of 1/2 lemon.
4-6 stalks of corriander leaves - finely chopped (use the leaves, keep aside the stems for any another dish)
salt to taste
chilli powder to taste - (about 1/2 tsp)
about 1 tsp of mustard oil / sarson ka tel
fistful of roasted groundnuts - optional

Mustard oil is completely based on personal taste. Use too little- you will not catch the flavour, use too much - you won't be able to eat the dish.

Method:
Mix the chopped and grated ingredients in a large mixing bowl and stir well.

Add the salt, chilli powder and mustard oil and mix thoroughly.
Add the groundnuts and puffed rice.

Mix well and serve immediately before it starts to turn soggy.
Perfect for a tea time or tv viewing snack.

The Bengali Version of Jhalmuri / Tel Muri normally has only puffed rice, onions, chillies, chilli powder, mustard oil and salt and is spicy rather than sour.

The Manglorean version tends to be salty, spicy and sour.


Recipe : Doodh Matar (Peas in a Milk sauce)

Found this recipe given to me by a friend long ago. I don't think, I've ever cooked it before. But it seemed an interesting twist to try, on the fresh peas available in the market just before they are out of season.

Ingredients:
1/4 kg (1/2 pound) fresh green peas - shelled (weight after shelling)
pinch of hing (asafoetida)

1 tsp ghee (semna/clarified butter)
1/2 tsp jeera (cumin seeds)
1/2 tsp haldi (turmeric) powder
2 tsp dhaniya (corriander) powder
200 ml milk
salt to taste

Method:
Warm the ghee in a hot pan.
Add the jeera, haldi, dhaniya and hing.
Lightly fry for a 2-3 minutes.

Add the peas, toss well, so they are well coated with the powders.

Cover and cook on medium heat for 10 minutes.
Cool the peas.
Slowly add the milk, stirring gently.

Put on a very low flame and cook till done (You need to keep an eye on the dish once you add the milk, and do not cover it to cook- no matter how low your flame is - to make sure the milk doesn't curdle or boil over. - I learnt this the hard way, had a lot of cleaning to do afterwards!)
Add salt to taste and serve hot with rice or rotis.
 Also in the picture - Paner Hariyali tikka and Zafrani Malai Chicken tikka

Monday, March 29, 2010

Recipe : Pan Fried Herbed Chicken

If I am busy through the week, then I like to marinate a couple of different kinds of meat and refrigerate them, so I can quickly bake or Pan Fry the dish for a quick dinner once I'm back home. I don't freeze my meat after marinating it because I dont like the taste and texture too much. Also the longest I keep uncooked meat marinated in the fridge is about 48 hours. As Indians we cook our meat way above the recommended heat and time levels to kill off bacteria + we have stronger stomachs :)

Ingredients:
1/2 kilo - 1 pound chicken (I used legs)
A little olive oil.

Marinade:

1-3 tsps of your favorite Italian herb mix (depends on how strong a flavor you want)
My mix included thyme, rosemary, oregano, chives and a solitary bottom-of-the-jar sundried tomato
2 tsps olive oil (plain or a flavored one - if flavored, it should compliment your spice mix - I used a lemon and thyme)
1 pod Chinese garlic - about 12 cloves roughly crushed (you can lessen this if you don't like garlic, but it gets completely cooked and has a very sweet taste at the end)
Some red chilli flakes or crushed black pepper to taste
salt to taste

dash of vinegar or lemon juice

Method:
Combine all the ingredients for the marinade.
Mix the chicken into the marinade
If baking the chicken, you can make a small slit along the bone and insert a bit of garlic from the marinade into that slit.
Marinate for at least 2 hours. I marinate this for 24 hours.

If Baking, bake as you normally would for any other boned chicken dish (not whole chicken)

To pan fry it:
In a hot pan, add a little olive oil (you can use the oil from the marinade too)
Sear the chicken pieces on both sides
Cover and cook till done.

I would normally serve this with another side of roast baby potatoes, but not wanting to up our carbohydrates any further, I just quartered one medium potato and added it to the pan while cooking.

Serve hot with pasta or bread.

Also in this picture Crunchy Veggie Pasta

Recipe: Crunchy Veggie Pasta

The pastas I make at home are much lighter in the summer months. Its just too hot to relish white sauce or even a bolgnese or any other heavy tomato based sauce, especially at dinner time.

The pastas I make during summer are light enough to be served as a salad too. This is one of the recipes that I use.

Ingredients:
1 cup uncooked pasta (for this and other non sauce recipes, I prefer short or minute pastas or spaghetti)
2 cups vegetables - mushrooms and baby corn - chopped in half
1 lemon - juice extracted
your favorite fresh herbs (I used parsley today)
2-3 cloves garlic
salt to taste
fresh cracked black pepper or red chilli flakes to taste
a tsp of olive oil

Method:

In a pan, bring water to boil.
Add a little salt (to flavor) and oil (to prevent sticking)
When the water bubbles add te pasta and cook till done. (al dente or soft).
Drain the pasta and immediately run some cold water through it to prevent sticking.

Choose a pan large enough to hold the vegetables and the cooked pasta.

In a hot pan, add the olive oil.
When hot, add finely chopped garlic.
Add the halved mushrooms when the garlic begins to brown.
When the mushrooms start letting out their water, add the baby corn.
Cover and give it a quick steam (1 minute)
Add the salt, black pepper/chilli flakes and chopped herbs.
Toss quickly so the flavors are distributed evenly.

Add the drained pasta + lemon juice and toss again.
Cover and leave on flame for a minute or 2.
Serve Hot.

If you want to serve it as a salad, it can be served cold too.
The lemon juice is essential because I hardly use any olive oil in this recipe, so this adds moisture to the dish.
If you would like to turn this into a Non-Vegetarian dish, you can add boiled chicken strips or cold meat strips (total quantity of meat + vegetables should be 2 cups)

The picture above has Crunchy Veggie Pasta and Pan Fried Herbed Chicken.

Kitchen Essentials: Tamarind (Imli/Puli/Amsan) Paste

There are some items, I just HAVE to have in my kitchen. Tamarind Paste/Pulp is one of them. Mum extracts fresh paste (from a tsp or so of tamarind) each time she cooks. But for me it makes more sense to pulp an entire ball (2-3kilos) and store it in the fridge.

My tamarind has always come from grandma's kitchen garden. At the right time of the year, tamarind pods are taken off the trees, the flesh is seperated from the pods and seeds and the flesh is then rolled into tight balls which dehydrate and become tighter as the days pass.

Grandma rolled some of the tamarind in salt, so it would keep longer. These balls were then distributed to her children and grandchildren when requested.

I prefer making my tamarind pulp from this to using store bought paste for the obvious reasons - purity & avoiding preservatives.

Its better to do this on a day when you have a few hours free to keep going back to your tamarind.
 
I prefer to pulp the whole ball at once, because it speeds up my cooking process.(I forgot to take a picture of the ball before starting. But its normally the size of  a cantaloupe.)

Place the ball of tamarind in a bowl (preferably non-metal), heat water in another bowl (if using tap water, boil thoroughly to kill as many micro organisms as possible and then cool)

Pour the hot water over the ball of tamarind to half its height. Let it soak for awhile. Then with a spoon try to disintegrate the ball. The more surface that is touched by water, the faster the process will go.

You may have to check on it multiple times to get the ball to completely split up. Add more water if you feel that it is getting too thick. When you have a reasonably thick pulp, strain the mixture through a seive. Bottle the strained pulp.

There will still be a lot of flesh attached to fibres. Put all this back in the original vessel and pour some more hot water on it. Repeat seive and water process till you feel you have extracted as much as you can from the tamarind.


The pulp should be the consistency of chocolate sauce or thicker as you can see above. If it is too thin, it could ruin the consistency of the dishes you add it to (ok, for curries, but not stir fries) And what is to be discarded will be completely dry.

If your last extract is very thin, then use that to make rasam or keep aside to use in a curry. Don't dilute the whole batch.

Bottle in a glass jar with a glass or plastic top (tamarind will react with anything metallic) preferably vaccum packed, especially if you have more than one bottle.

I keep this paste for 6months to 1 year in the fridge without any trouble and use as needed. If your tamarind ball doesn't have any added salt, you can add some to help lengthen the life of the Paste/Pulp.

The dry roughage/ waste of the tamarind is extremely good for polishing brass and copper items.

This is why I normally keep aside a whole day for making tamarind paste as I normally follow it up with a polishing session. Its as good or better than any store bought polish (+its natural +gentle on your skin +no breathing in harmful chemicals.)

Here is a Before after Picture :)
It needs just a little elbow grease.

Friday, March 26, 2010

Martha Stewart is following me on Twitter!

Yes, its the authenticated Martha Stewart! and she is following Me

So kicked about this. she has close to 2 million followers (1905158 last I checked) and she follows about 2500 and "I" am one of those!

It has to be because of this blog!

Going to get some chocolate to celebrate

Recipe: Eyeball It - Sambhar

I make broadly 2 types of sambhar. The first is the traditional one followed from nana's recipe. The other is something I call "Eyeball It - Sambhar". this makes use of a lot of vegetables, so you just keep an eye on it and add and subtract as necesarry. I'm giving both the recipes here. What I made yesterday was an "Eyeball It - Sambhar" but since its diffcult to give quantities for something like that, I'm sharing the other recipe with you too.


Nana's Traditional Sambhar
In pressure cooker
2 tomatoes
2 onions
2 cups of different chopped vegetables
(brinjal and drumsticks essential)
cauliflower/knol khol/moge/ash gourd/potatoes/small sambhar onions/beans/radish/carrots
Cook them with 1/2 cup masoor/tuvar dhal for 1-2 whistles
Give seasoning with mustard, little jeera, red chillies, curry leaves and hing (asafoetida)
Just before turning off the flame add the sambhar powder.
Add tamarind or lime and salt to taste.

The typical Kannadiga (Karnataka) sambhar includes the use of jaggery which sweetens the dish. I'm not a big fan of sweetish sambhar, (Admission:, I hate the sweetish sambhar, I prefer the spicy Tamilain version), so I toss out the jaggery completely.


Eyeball-It Sambhar
Sometimes when I know that I would like to make sambhar or pav bhaji in a few days, I start keeping aside a little bit of the vegetables before cooking to be used after 3-4 days.
Vegetables that can be used are brinjal, drumsticks, cauliflower, knol khol, moge, ash gourd, potatoes, small sambhar onions, beans, radish, carrots.
I consider drumsticks essential for the true flavor of sambhar to come through. But you can continue even if you don't have them on hand.


Cut up the vegetables that you have saved into bite sized pieces. I like to add at least 1 medium potato because it thickens the dish.
Depending on how much vegetables you have, cut up tomatoes and onions into 1/8ths so they have triangular shapes. (sorry, forgot to take a picture of this)
Boil some dhal -masoor will boil fastest or pressure cook some tuvar/arhar dhal or even if you have some leftover dhal whose tempering is not very strong and will blend with the sambhar flavours, you can use that.

In an open pot (I prefer this to a pressure cooker, so I can have all my vegetables cooked just right, rather than the cauliflower and carrots getting overcooked to match the cooking time of the potatoes), boil some water and add vegetables in order of their cooking times.
Potatoes, onions, tomatoes go in first for me. I like the tomatoes and onions to get very well cooked, so their flavours seep into the liquid.
Add a little hing (asafoetida) and methi (fenugreek) seeds at the time of adding the potatoes (to help cut the gassy effects).
If you prefer your carrots firm, add them last.

When the vegetables are half cooked, add the dhal, salt to taste and a pinch of turmeric powder.
Give it a boil.
Then add the tamarind extract/lemon juice/vinegar and sambhar powder and cook for 5-10 minutes
For tempering, I like curry leaves, mustard seeds and red chillies.
The chillies in this picture are short Sudanese chillies (the only spicy kind available in Egypt)
Add the tempering to the sambhar and be careful to avoid splashing (hot oil meeting high quantities of liquid)
The best way is to use the pot cover as a shield between you and the pot.
Serve immediately with dosas or idlis or hot rice.
Other items on the plate are coconut chutney, Chutney pudi chutney, idlis & dosas

Recipe: Mummy's White Coconut Chutney

This is my mum's recipe. She too is an excellent cook and I may not give her enough credit on this blog, as nana takes centre stage among my cooking idols. Nana had a retinue of household help. Mum does it all on her own. She turns out dinners for 40-50 people and makes really elaborate dishes.

When I'm cooking for larger groups, I automatically cook simpler recipes because of the quantities involved and I want everything to be fresh. Mum will forego a few hours of sleep and do the grating, grinding, coconut milk extraction of 10-12 coconuts, cleaning of the fish and meat etc, grinding of poli (dosas) batter and still be smiling when the guests arrive.

Ingredients:
5 green chillies
1/2" ginger
1-2 cloves garlic
1/4 coconut
1/2 tsp salt
tamarind marble sized ball (substitute lime juice / vinegar for color - tamarind will turn the chutney dark)

Method:
Grind with a little water.
Season with curry leaves and mustard.

Other items on the plate are sambhar, Chutney pudi chutney, idlis & dosas

LinkWithin

Related Posts with Thumbnails

ShareThis