Friday, December 20, 2013

Recipe : Gujarati Style Fresh Turmeric Pickle - Kaccha Haldi / Amba Haldi Achaar (Vegan)

Come end November - December and the laaris (local hand carts) in the markets of Gujarat have a corner dedicated to Rhizomes -  kaccha haldi (tender turmeric) and amba haldi (literally- green mango turmeric - it looks white like ginger, but has the sour taste of green mango and a mild flavour of fresh turmeric).

Locals regularly buy these items through winter and serve it up as a pickle with every meal as these 2 spices are supposed to help keep the cold of winter from affecting your body, and builds immunity and resistance against winter infections.

In its simplest form, a small piece of tender turmeric or amba haldi is chopped/julienned and sprinkled with salt and lemon juice just before serving on the table, with chilli powder being optional.

In its fancier form, it involves drying, tempering etc.


I personally prefer the flavour of the simple one, but for 2 people it doesn't make sense to keep chopping up a tiny piece daily, so after looking online and speaking to a few Gujarati friends I created a recipe that I liked.

Please Note :
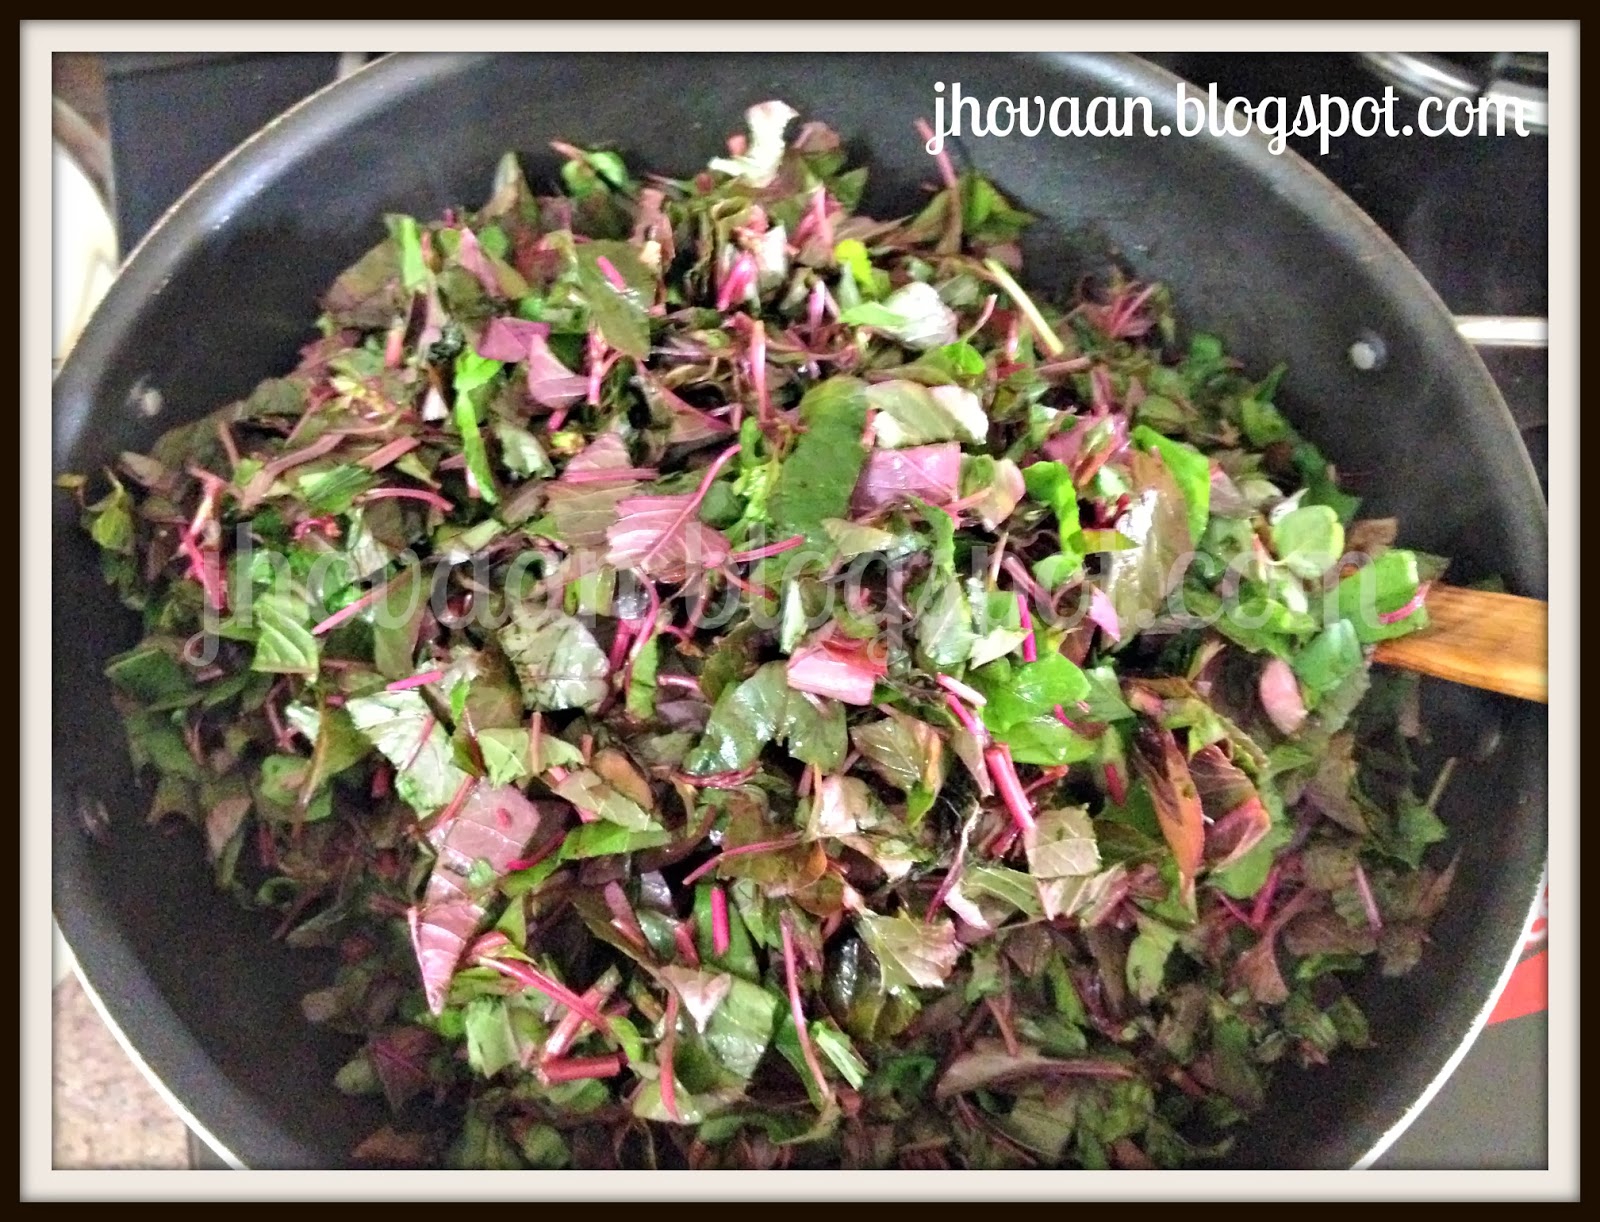
While my photos will show that I used some of the lovely fresh red winter carrots in the pickle, from experience, I would now say that don't use carrots if you plan to store the pickle for more than a couple of days, as it turns soft.

Also, we preferred the flavour of amba haldi to the regular fresh turmeric, so I've upped the quantity in the recipe below.

The recipe that follows is what I've fine tuned based on experience and taste, but my pictures will show what I actually used, so don't let it confuse you. Follow the recipe words and don't worry about the quantities in the pictures, they are for illustrative purposes only. Also feel free to play around with the quantities to evolve something that suits your families taste buds.

Ingredients :

100 gms kaccha haldi / tender turmeric
100 gms amba haldi
5-30 green chillies (depending on spiciness and your families spice tolerance. I like mine spicy, so I used 30 spicy green chillies, if you want a mild flavour 5 green chillies is fine. But use the thin crispy style chillies - Indian chillies and Thai Birds eye chillies work well)
20-30 limes (you need the juice to completely cover the turmeric, so quantity will differ based on juiciness of limes, don't use limes that are very sour or bitter)
salt to taste - at least a tablespoon

Method:
Wash clean any mud on the surface, then scrape clean the kaccha and amba haldi and julienne it to around matchstick length.
Slit the green chillies lengthwise into 2 or 4 slices depending on thickness.
In a clean, dry glass / ceramic jar layer the turmeric and chillies, sprinkling a little salt at intervals.
Once the jar is full, squeeze the juice of the limes into the jar (taking care not to get any seeds in)
Cover with a thin cloth or tissue with a string or rubber band holding the mouth closed.
Keep it in the sun for 2 days, then give a nice stir or shake and refrigerate.

Take out as required and serve as a side with meals (2-6 sticks per person per meal is normal consumption)

Tips:
1. Make sure the bottle that you use has a plastic / glass or ceramic cover (not metal)
2. Make sure the bottle is completely dry before you use it and use a dry spoon each time you take anything out of the jar.
3. If a thin white film forms on top, it hasn't gone bad - its a normal phenomenon for pickling in brine (salt water), just bob the solid pieces below liquid level and give a stir and continue to use as normal.
4. Don't return pickle pieces back into the bottle once they have been exposed to air (if you serve it up for dinner in a plate and it doesn't get completely consumed), store it in a seperate box/bottle and use up before opening your main bottle again.
5. The fresh turmeric stains very very badly. My hands remained yellow and the nails looked jaundiced for at least 4-6 days. Watch out for your clothes. You may want to use gloves. I personally don't like to use gloves when prepping food, because my style of cooking enjoys the tactile sensations of the cooking process, If you do use gloves, use the thin ones that give you control and grip over the tiny turmeric pieces.
6. Choose the straightest and longest pieces of turmeric that you can find, it helps ease and hasten the skinning step.
7. I chopped off the tiny bumps and washed them and kept them in a little bowl in the fridge. I substitute one bump (smash before use) for powdered turmeric in my recipes, especially dhal.

Thursday, December 12, 2013

Bacardi Breezer Cranberry #Catchtheflavour

Bacardi Breezer is currently running an online contest #CatchTheFlavour, where they have asked bloggers to choose their favourite flavour from Jamaican Passion, Lime, Cranberry, Orange, Blackberry Crush and Island Pineapple.

When I first tried to participate, only positions on Team Pineapple were open, but Pineapple is my 3rd favourite flavour among the breezers. So I waited for a week and lo & behold, my first choice Team Cranberry had spots open again. YAY!!!


While I cannot buy or drink Breezers in Ahmedabad where we have been based for the last year and a half, I still enjoy them whenever I travel out of Gujarat, which is at least once a month.

I've always been a rum drinker and these pre mixed drinks by Bacardi (the first entrant in this segment in India) are perfect for parties. You don't have to mix them and serve them in fancy glasses (which you always worry will start getting broken as the night wears on) or in plastic cups (while worrying that you might come across as a a cheap/lazy host/hostess).

You just chill them in the fridge and open and serve, what could be easier?

The fruit flavours that they come in, also psychologically feel like they are healthier and less toxic than the normal aerated mixers.

Coming to the Cranberry Bacardi Breezer, why is it my favourite?
1. Its base is Bacardi Rum (so what if its only 2% alcohol in India, if I want something stronger, I top up my breezer with a little more Bacardi)
2. Cranberry juice is supposed to be great for women and specifically for urinary tract health (couple this with the fruity goodness and its easy to convince yourself, that this drink is good for you and your health)
3. I love the tangy, yet sweet, with a slight hint of bitterness flavour of the Cranberry version.

Yes the pineapple version has it too, but without the puckering effect of cranberry.

So, if you've been paying close attention, you now know what my 1st and 3rd choices are, what do you think my second most favourite flavour is?

PS: I'm waiting for Bacardi to introduce the watermelon, coconut, chocolate, pinacolada and raspberry flavours in India too.

Note: Pictures are downloaded from the web for representational purposes only, since I don't have access to the real bottles here in Gujarat.

Friday, December 06, 2013

Recipe : Kheema / Mince Parathas

This is a great way to finish up leftover mince - whether it is  chicken, mutton or beef mince. And it turns into a complete meal, with just some raita on the side, especially if you have peas or carrots in your mince.

Ingredients : 
1 portion leftover mince
wheat flour
salt to taste
water for the dough
a little oil or ghee for frying

Method:
Mash the mince a bit if you have large vegetable chunks in it and dry it out, if it is liquidy.
Bring the mince back to room temperature.
Make a dough with wheat flour, salt to taste and water.
Make lemon sized balls and flatten them into circles, thick in the center and thinner at the edges.
Put a spoon of kheema in the centre and fold the edges over the kheema to form a ball.

Flatten and roll the disc in plain wheat flour.
If using a roti maker, put a dab of oil on each side (without rolling in flour) and make rotis as normal.
If using a tawa, fry on each side on a low flame, putting just a little oil or ghee on each side to help crisp it up.
Serve hot with cold raita.

Thursday, December 05, 2013

Recipe : Tamdi Bhaji / Laal Bhaji / Red Amaranth Greens - Vegan

My college friend May, from The Chef moved to Ahmedabad, a couple of months ago and its great fun to have her here in town, even though she stays a bit of a distance away from my place.

However, she recently discovered that the farmers on the little plot of agricultural land in front of her house, sell fresh produce  on a daily basis. The produce is the freshest ever, plucked in front of your eyes and washed and clean. So the next time I went to visit her, we went together to pick up some fresh veggies. Our haul for the day included methi bhaji, lauki (bottle gourd), brinjal, corriander, radish and tamdi bhaji.

When I brought the bhaji home, it was so clean, that it took me much less time than normal to clean it and it was so fresh and tasty.


Ingredients :
1 large bunch Tamdi Bhaji / Laal Bhaji / Red Amaranth chopped (about 500gms)
1 tsp oil
12-15 cloves garlic chopped (you can use less if you don't like the taste of garlic)
1 large onion chopped
1 large tomato chopped
6-12 green chillies slit in half or chopped (quantity depends on spice levels)
salt to taste
1 lime

Method:
Heat oil in a pan.
Add the chopped garlic and cook till it browns and starts to crisp up.
Now add the onions, tomatoes and green chillies.
Cook till soft.
Add the Tamdi Bhaji / Laal Bhaji / Red Amaranth and cook till done

Add salt to taste
Squeeze the lime juice over the bhaji, stir well and take off the fire.
Serve hot with dhal-chawal or rotis


Note: 
When cooking bhaji, a lot of people use just the tender stems, I used the thicker stems too, but I cut them up much finer than the leaves and added them with the tomatoes.
If the bhaji dries as you are cooking it, add a tsp of water at a time.

Wednesday, December 04, 2013

Recipe : Lebanese Cucumber with Minted Yoghurt

This dish is often served as an appetiser - a dip with pita bread or as part of a main course - sauce with kebabs. Similar to Indian Raita, what makes it unusual is the addition of fresh garlic in the dish. This dish can also be served as a side with Biryani. If you can't find Pita Bread, use any rolled breads you can find, the taste goes well with kulchas or khakhras too.


Ingredients :
2 medium cucumbers (roughly 250 gms)
200-250 ml thick yoghurt (curd / dahi)
1 tight handful finely chopped mint leaves (discard the stalks)
1 clove garlic crushed
1/2 tsp cumin / jeera powder
1 tbsp lime juice.
salt to taste

Method:
If your cucumbers have hard seeds, then cut the cucumber in half and scoop out the seeds.
Chop the cucumber flesh finely.

In a bowl, gently beat the yoghurt, so that it becomes smooth.
Add all the other ingredients and gently mix them all adjusting lemon juice and salt to taste.
Serve chilled as a dip or as a side.

Garnish with some cumin powder if you like.

Tuesday, December 03, 2013

Recipe : Bagdadi Restaurant's (Mumbai) Paneer Bhurji

Ever since I saw Chef Vikas Khanna's "Savour Mumbai - A Culinary Journey Through India's Melting Pot" at a bookshop, I've been itching to cook from it. My copy arrived on the 30th and since I had some Paneer in the fridge, the first recipe I decided to try was the Paneer Bhurji from Mumbai's Bagdadi Restaurant.


The recipe is extremely simple and quick to make. However, I used Goverdhans packaged paneer which turned out to be smooth and on the creamier side, but I think the taste and texture would be much better with fresh paneer or homemade paneer, especially on the day that you are upset that your paneer hasn't set well (tight).

This recipe reflects my higher heat, lower oil variation

Ingredients : 
300 gms fresh cottage cheese (paneer)
1 tsp oil (I used refined, 2 tbsp were recommended)
1/4 tsp cumin / jeera seeds
1 medium onion finely chopped
1 medium tomato finely chopped
6-8 green chillies finely chopped (original recommendation was 2)
1/4 tsp turmeric powder
1/4 tsp corriander powder
salt to taste
fresh coriander to garnish - finely chopped

Method :
Crumble the paneer roughly with your hands and keep aside.
Heat oil in a pan, add jeera seeds.
When they crackle, add onions and saute till they soften.
Add chillies and tomatoes and cook till tomatoes are soft and pulpy.
Now, add turmeric, corriander powders and salt and cook for 2 minutes or so.
Add paneer, mix well and cook until the water dries up.
Take it off the heat, garnish with corriander leaves and serve hot with dhal-chawal, rotis, parathas or on toast.

Book Review : Savour Mumbai - A Culinary Journey Through India's Melting Pot


In "Savour Mumbai - A Culinary Journey Through India's Melting Pot" Michelin Chef Vikas Khanna takes the reader on a journey across Mumbai to some of his favourite restaurants and eateries. He selects some of their signature dishes and modifies them for a home cook.

Its also his attempt to show the wider world, that Indian food is not all about Punjabi food.

The reason I picked up this book, is that a lot of the restaurants covered are favourites of mine too and I jumped at the chance to get insider dope on their recipes. Restaurants covered are Bademiyas, Bagdadi, Banana Leaf, Dakshin, Diva Maharashtracha, Goa Portuguesa, Good Luck, Govinda's, Ideal Corner, Kangan, Kebab Korner, Kebabs & Kurries, Khyber, Lucky, Mahesh Lunch Home, Nawab Saheb, Noor Mohammadi, Oh! Calcutta, Raj Bhog, Saffron, Soam, Soma, Soul Fry Casa, Temple Flower, Trishna and Vrindavan.

So, how many of these are your favourites?

As you can see from the restaurants covered, there's plenty of cuisines represented in this book: Parsi, Goan, South India, Gujarati, Malvani, Maharashtrian, Konkani, Manglorean, Malyali, Irani, Mughlai,


Multiple 'Biryani' recipes from Lucky, Good Luck, Govinda's, Ideal Corner and I'm itching to try out each of them, even though they all look sinfully rich, especially the Chicken Rashida with biryani.

There's a short section on Mumbai's iconic street food too with recipes too for the Bombay sandwich, vada pav, golas and many other items anyone who has lived in Bombay will have fond memories about.

Savour Mumbai is a full-colour book filled with beautiful pictures that capture the spirit of Mumbai. Each recipe has a accompanying picture too, to show you what the ideal finished product should look like. Even if you never attempt to cook from this, its a beautiful coffee table souvenir - an ode to Mumbai's thriving food culture.

I can't wait to get cooking from this book, so much to try, so little time.

Rating : 4.5 / 5


Monday, December 02, 2013

Recipe : Manglorean Snake Gourd (Podwole / Parwal) Sukke - Vegan

Snake Gourd / Podwole / Parwal is a lovely vegetable, that's low in calories and good for health.

This is a typical Manglorean Konkani way of preparing the vegetable. The distinctive taste comes from the Manglorean Vegetable Powder. But if you can't find Manglorean Vegetable Powder, you can use any other (red) Vegetable Powder.


Ingredients :
1/2 kg Snake Gourd / Podwole / Parwal
1 tsp coconut oil (regular oil will also be ok, coconut gives it a better flavour though)
1 tsp split black gram (urad dhal)
1 - 2 sprigs curry leaves (about 12 leaves)
2 - 4 dried red chillies
1 tsp mustard seeds
2 - 3 tbsp vegetable powder (to your spice levels)
salt to taste
1/2 coconut grated
pulp extracted from a marble sized ball of tamarind (or juice of lemon to taste)


Method :
Clean the Snake Gourd / Podwole / Parwal, you can use the skin, you don't need to peel it.
Cut it in half down the length and deseed.
Make thin slices.

In a pan, heat the oil.
Temper with urad dhal, curry leaves, red chillies and mustard seeds.
Now add the Snake Gourd / Podwole / Parwal and fry lightly.
Add the vegetable powder, cover and cook on a low flame.
If it dries up, add water a tsp at a time.
When the Snake Gourd / Podwole / Parwal is almost cooked, add the coconut and tamarind pulp/lime juice. Stir well and cover and cook till done.
Serve hot with rice and dhal or a side with any poli.


In the picture above, I've served it with appams and a chicken coconut curry.

Sunday, December 01, 2013

Recipe : Kolhapuri Chicken Curry & Dry Kolhapuri Masala

The trick to making Kolhapuri Chicken Curry is in having a good quality Dry Kolhapuri Masala. However, this is difficult to source outside of Maharashtra, but don't worry you can make some yourself. I keep my excess masala in the fridge and use it as a vegetable powder or general spice mix when cooking later on. It keeps well for more than a month.

If you have the spice mix, its reasonably easy to cook this recipe, but be warned, this dish takes a little time. However the end result is worth it.

Dry Kolhapuri Masala
5 dry red chillies (preferably Kolhapuri Chillies or any spicy chillies will do)
3 tbsp red chili powder (for additional heat)
1 1/2 tsp cumin seeds (jeera)
2 tbsp dessicated coconut (kopra)
1 tsp white sesame seeds (til)
1/4 tsp fennel seeds (saunf)
1/4 tsp nutmeg (jaiphal) grated / powder
1/2 tsp poppy seeds (khus khus)
2-3 bay leaves
1 tsp black peppercorns
1/4 inch cinnamon stick
2 cloves
1/4 cup coriander seeds

Method:
In a heavy bottomed pan,roast each of the ingredients separately (except the spice powders, those are pre-roasted before powdering and will burn) on a low flame, without burning.
Cool the ingredients and blitz in a food processor / grinder.
These quantities should give you about a katori of spice powder.


Ingredients for the Curry:
1/2 kg chicken
2 tbsp oil
2 large onions sliced thin
1 tbsp ginger garlic paste
1 1/2 cup chopped coriander leaves (dhaniya)
1 1/2 cup coconut milk
salt to taste
coriander leaves for garnishing


Marinade
4 tbsp yogurt / dahi / curd
1/4 tsp turmeric powder (haldi)
3 tsp red chili powder
3 tsp dry kolhapuri masala

Method :
Mix all the marinade ingredients to a smooth paste and marinate the chicken in the mixture for an hour or overnight or even a couple of days in the refrigerator. (if you marinate meats over the weekend for the coming week, this is a good one, but remember to bring the meat back to room temperature before cooking.)


Heat 1 tbsp oil in a pan, add the sliced onions and ginger garlic paste. Fry till the onions are browned.
Remove from heat and let it cool.

Once the onion mixture has cooled, blitz it in a food processor / mixi / grinder with the 1.5 cups coriander leaves until smooth.

Heat the other tbsp of oil in the same pan and fry the marinated chicken in this.
(Don't add the marinade to the pan right now, we will add it later)
Fry the chicken for about 10 - 12 minutes in the pan on medium to high heat. Keep stirring gently to prevent sticking.
Add half the ground masala to the pan and fry till it starts reducing.


Then add the remaining masala and leftover marinade.
Cover and cook till chicken is done.
Now add the coconut milk and cook a little longer.
Adjust salt to taste
Garnish with coriander leaves before serving.

Serve hot with phulkas, chapatis or bhakri.
You can also serve it with rice,  and if you want a thinner curry, add more water or coconut milk.


Also in the thali is Maharashtrian Chawli Usal & Groundnut Chutney.

Variation :
You can use this recipe to make egg curry too.
Hard boil 6 - 8 eggs, peel, make 2-4 small slits on the boiled eggs and put them in the marinade.
Don't fry the eggs, the way you would the chicken. (it will make the eggs hard on the outside)
Start by directly cooking the masala and when almost cooked, add the extra marinade and cook till done.
Then add the marinated eggs and give a boil till the raw smell goes.
Now add the coconut milk and garnish with corriander leaves.

Tuesday, November 19, 2013

Book Review : Young Chefs - Vikas Khanna


Chef Vikas Khanna released his latest book - Young Chefs - on November 14th (Children's Day) in collaboration with Penguin India / DK Books.

Vikas Khanna is a Michelin starred Chef. As a judge on Masterchef India and Junior Masterchef India he is now a well recognised name and face in most foodie households in India.

The recipes in "Young Chefs" are well illustrated with a lot of them following a photographic step-by-step format, which makes them easy to follow for kids (they can check the pictures to verify consistency, texture and colour). I personally think that the first few pages are the most helpful section of the book. They include a photographic index of cooking tools, preparing ingredients and ways to cook & bake.

The book is divided into 5 main sections – breakfast bites, lunchbox, main meals, drinks, and sweet
treats.

Each recipe clearly mentions number of portions, prep time, cooking time and a lot of them also itemise the tools needed for each recipe to be prepared. I think, that is a wonderful idea for young cooks, so they can have all their tools ready along with their ingredients. Some recipes also have doodles of the ingredients and tools used.

There is also a warning sign (white exclamation mark in a red triangle) against recipes / steps which involve hot ovens, hobs, or sharp implements. Depending on the age of your child you can interpret it to mean adult help or adult supervision.

The recipes range from simple boiled eggs and eggy bread (French Toast) to Sweet Corn Fritters, Chilly Paneer, Veg Lasagna and Chicken Tikka Masala. The recipes aren't restricted to Indian staples, they come from all across the globe. But they are all dishes that are exciting for young chefs to cook or eat. Fun facts and tips accompany some recipes.

Its a lovely book to introduce a young chef to the pleasures of cooking, but there are a few things, I hope they can take care of in the next book.
- The recipes for crepes and pancakes are combined on one page in a manner which I think may cause some confusion for a novice cook.
- The recipe for cheese & pesto straws calls for cooked shredded chicken breast in its ingredients but isnt used in the recipe.
- On the page with 4 ways with kebabs - the non veg kebabs have a prep time of 20 minutes, but the prep time for the tofu chunks is 80 minutes. I later realised they had clubbed the marination time with prep time, but it was only for this recipe and not the other 3. Some standardisation will need to be maintained.

My other concerns with this book are:
- Some ingredients like yellow cherry tomatoes, smoked haddock and baby leaf spinach are difficult to find even in a larger Indian metro cities.
- Most recipes call for canned tomatoes and chickpeas and other ingredients. Given the availability of fresh ingredients in India and the side effects of preservatives and sodium in canned products, I would like to see an alternative with fresh produce listed alongside the canned ingredients. 
- The kids pictured in the recipes look so clean and neat, i don't know many young chefs who are so spotlessly clean when cooking. a slightly messy apron seems more natural to me than the pristine cleanliness pictured.

However, these are more minor personal peeves than a vote against the book.

I honestly think that its a great collection of recipes to get a young chef started. Its a lovely gift to present to a young kid and I hope the next edition takes care of the little oversights in this edition.

As Chef Vikas Khanna says in his introduction "Here's to the future Michelin star chef!"

Rating : 3.8 / 5

Note: Young Chefs is not yet available on flipkart or amazon. I was sent a copy of this book by Penguin and it was launched on the 14th, so I'm not sure if it is available in bookstores yet, but keep your eyes open and I'll update the online buying links as soon as they go live.


Saturday, November 02, 2013

Recipe : Maharashtrian Chawli Usal / Lobia / Black Eyed Peas Curry - Vegan

I was bored of eating lobia / chawli / black eyed peas, the normal way that I make it (like a Punjabi channa masala style), I'd also been craving coconut for awhile (growing up, all 3 meals had coconut in some form or the other), so a Maharahtrian Konkani recipe seemed like the perfect fit. Spicy and coco-nutty.

This recipe is an amalgamation of remembered flavours (from my days living in Bombay & Pune) and some online help. I made the usal much thicker than is normally served in Marathi restaurants and ideally, I would have liked to cook the tomatoes much more, which I shall do the next time I repeat this dish (this recipe is corrected to add the tomatoes earlier, if you prefer your tomatoes slightly raw, add the tomatoes to the mix when adding the cooked beans).

It does take a little time to prepare and has multiple steps, but the final product is worth it.

Ingredients :
250gms lobia / chawli / black eyed peas (soaked overnight with a pinch of asafoetida)
2 tsp oil (Sesame/til or sunflower, don't use mustard)
3 medium onions

1.5- 2 inch ginger
6 - 10 garlic cloves
2 tbsp saunf / fennel seeds
1.5 tbsp corriander (dhania seeds) or  1 tbsp corriander powder
half a grated coconut - fresh or frozen (roughly about 1 cup)
2 tbsp dessicated coconut (this adds a second texture, but it is optional)
1 tomato chopped1 tsp turmeric powder
1-2 tsps red chilli powder
1 tsp Maharashtrian masala (goda or malvani) or any garam/vegetable masala (if you can't get your hands on the Maharashtrian masalas)
1 handful chopped corriander for garnishing

Method :
Pressure cook the soaked lobia / chawli / black eyed peas in enough water to cover + a little more.
You can either drain and discard the water or use the liquid when making the usal. I prefer to use it.

To make the masala, take the pan that you plan to cook the usal in (large enough)
Heat 1 tsp oil
Add 2 chopped onions and fry till translucent.
Add ginger and garlic and fry till they start releasing their aroma.
Add fennel seeds and coriander seeds (if using powders add them at the end in the blender, not now) and fry till they crisp up.
Add the fresh and dessicated coconut and roast on a low flame (coconut burns quickly, so keep an eye on it)

Turn off the heat when the coconut turns golden brown
Cool the mixture and then grind it fine (some restaurants serve it slightly grainy).

In the empty pan, heat the other tsp of oil.
Add the remaining chopped onion and tomato and fry till cooked.
Now add the ground masala and fry for a couple of minutes before adding the spice powders.

Stir well and add the pressure cooked lobia / chawli / black eyed peas.
If you are using the water that you cooked the chawli in (it may be black in colour, don't worry about it), be careful how much water you add to the pan.
Add salt to taste and bring it to a low simmer.
Keep cooking on a low flame until the ingredients are all cooked and the chawli has absorbed the flavours.
Garnish with chopped fresh corriander.

Serve hot with steamed rice or phulkas / rotis

Friday, November 01, 2013

Recipe : Kadalekai Chatni / Peanut / Groundnut Chutney - Vegan

This is a chutney, I really loved as a child. It was a great break from the staple coconut chutneys and mum normally made this to accompany goli bajjes.


It was only after I started cooking on my own that I realised how much easier it is to grind a peanut chutney compared to a coconut chutney, so its practical and fast too.

Currently with all the diwali hampers coming home, we have also received quite a few packets of flavoured roasted peanuts (kadalekai) and most of these snacks are too salty for my taste. So on this occasion, I used half a cup of mixed flavoured peanuts, rather than fresh groundnuts and the rest of rhe ingredients balanced out the saltiness and the flavours added to the groundnuts, added to the chutney too.

This chutney can be served with idlis and dosas / poli like any other chutney. It also tastes great with rotis and its high in protein. Most kids love nuts, so they will love this chutney too and believe me when I say that it is much easier and faster to grind than coconut, even if you are using a food processor / mixi.

Ingredients :
1 cup peanuts / groundnuts (roasted and skinned or the flavoured roasted variety)
1/2 tsp oil (til/gingelly or sunflower)
1 cup chopped onions (normally we use the smaller sambhar onions/shallots, but regular onions will do)
4-8 dried red chillies (depending on spiciness and heat tolerance)
6 cloves of garlic (you can chose to omit this, if you prefer, chop them if they are large sized)
tamarind pulp to taste
salt to taste

Seasoning :
1 tsp oil (til/gingelly or sunflower)
a pinch of hing powder (asafoetida - aids in digestion of the heavy nuts)
1 tsp split black gram dhal (urad dhal)
1 tsp mustard seeds (sarson / rai)

1 sprig curry leaves


Method :
Roast the raw groundnuts in a hot pan till cooked and skin them (you can leave the skin on, but we don't like the taste)
If you are using roasted masala groundnuts, you can skip this step.
But if you have leftover roasted nuts that have gone a bit soft, then re-roasting them helps.
In 1/2 tsp oil saute the chopped onion, garlic and red chillies till slightly brown.Cool the fried mixture.

When cooled, add it to the mixi with the skinned peanuts and the tamarind pulp.
Whizz until it reaches your desired consistency. I like it slightly grainy, but some prefer it completely smooth.
You may need to add a little water to help the grinding process if it gets too dry.
Add salt to taste (if use flavoured groundnuts, remember they will already have salt, so adjust accordingly) and give it a quick spin.

Pour the chutney out in a bowl.

In a seasoning pan, heat 1 tsp oil.
Add the hing powder.
When it dissolves, add the urad dhal and fry till it turns light brown.
Add the mustard seeds and the curry leaves and let the seeds splutter.

Pour this tempering over the chutney.

Serve the chutney with idlis and dosas / poli or with phulkas and dhal.


The chutney keeps well in the fridge too for about a week.


Note: The pictures above show quantities for 1/2 cup peanuts

Kim's Tip : The water used to wash the mixi / grinding stone can't be added to the chutney as it will become too watery, but you can use it to knead atta for rotis and give your rotis a different flavour.

Thursday, October 31, 2013

Recipe : Vankaya Vepudu / Andhra Brinjal (Aubergine) Roast -Vegan


The other day, I wanted to cook Brinjal in a different way than I normally do and I've been longing to cook from Jigyasa & Pratibha's books FOREVER! So I quickly browsed through them and decided that Pedatha's recipe for Vankaya Vepudu - Andhra Brinjal Roast was ideal for what I had in mind.

I served it with rotis and African Chicken Peanut Butter Soup, but you can just serve it with dhal and rice and it tastes excellent.

I stuck to the original recipe, just cut the brinjals smaller (for faster cooking), made it spicier and reduced the oil.


Ingredients :
1/2 kg Brinjals (I used the small ones and chopped them into 12 pieces each - it would be better to not use the bharta variety, because each piece needs to have a bit of skin for texture)
2 tbsp red chilli powder (original recipe called for 1)
salt to taste

For Seasoning / Tempering:
1 tsp oil
1 tsp urad dhal (split & husked black gram)
1/2 tsp mustard seeds (sarson)
1/4 tsp asafoetida powder (hing)
1/4 tsp turemeric powder
6-8 curry leaves

Method :
In a wok, heat oil for tempering.
Add urad dhal, when it turns golden, add the mustard.
Lower the flame and add the rest of the tempering ingredients
Add brinjal and allow it to roast on a low flame stirring occasionally.

When the brinjals turn light brown (8-10 minutes), add salt and chilli powder.
Continue to cook on a low flame, stirring in between, until well done.
If you like crisper vegetables, add more oil when cooking.


Vankaya Vepudu served with rotis and African Chicken Peanut Butter Soup

This recipe can also be used to make potatoes, bitter gourd or lady's finger (okra / bhindi)

For details and for more yummy recipes, I highly recommend buying the book "Cooking at Home with Pedatha" by Jigyasa Giri & Pratibha Jain


Note : The Picture for the Brinjal recipe is from http://www.innoconcepts.com/pedatha

Wednesday, October 30, 2013

Book Review : Cooking at Home with Pedatha

I had bought "Cooking at Home with Pedatha" in January 2011, shortly after winning "Sukham Ayu" in an online contest on facebook. The authors of these 2 books - Jigyasa Giri & Pratibha Jain have become foodie friends since then and they are both complete sweethearts who have a wonderful zest for life as well as food.

However, I'm guilty of never cooking from either of these books for almost 3 years -  for the simple reason that they were "Vegetarian" cookbooks and Vegetables for me are just a side dish to be consumed to give the body adequate nutrition and not really something I enjoy cooking or eating.

As I age and travel around Gujarat, I realise that vegetables too can be main courses in a meal and I'm trying to cook more such food.

When I wanted a different way to cook brinjal, these were the first 2 books that I picked up and I wasn't disappointed.

"Cooking at Home with Pedatha" was awarded the Best Vegetarian cookbook in the world at the Gourmand World Cookbook awards 2006 and once you start reading it, its easy to see why.

The Pedatha (eldest aunt) in question is Mrs Subhadra Krishna Rau Parigi, daughter of India's former President - Dr. V V Giri. Jigyasa & Pratibha decided to document Pedatha's knowledge of Andhra food after relishing yet another meal at her house. The accuracy of her recipes, inspired them to turn a personal collection of recipes she shared with them, into a cookbook.

And having tried the brinjal recipe above I have to attest to the accuracy of recipes too. I often tweak recipes considerably, but in this case I just increased the chilli and decreased the oil and the end result was fantastic, for such a simple and easy recipe.

The sections are divided into Chutneys (Pachchadi), Powders (Podi), Rice (Annam), Vegetables (Koora), Dals (Pappu, Chaaru), Yogurt (Perugu), Sweets (Theepi), and Crispies (Vadiyalu).

The recipes are very simple and well written, so even a novice cook or someone completely new to Indian cuisine, can easily understand and master them. There's a beautiful visual glossary at the end, for someone who isn't familiar with the terms and ingredients in this book.

The pictures throughout the book are beautiful and illustrative. I'd highly recommend this book, to anyone interested in cooking Indian food for the first time, or looking to expand their repertoire of Vegetarian dishes or seeking a deeper knowledge of Andhra cuisine.

Rating : 4.5 / 5

Note : The Picture for the Brinjal recipe is from http://www.innoconcepts.com/pedatha

Tuesday, October 29, 2013

Recipe : Sweet Potato Tikkis / Shakarkhand - Vegan

We love Sweet Potatoes and the best way to have them is roasted on coals with tart and spicy flavours. But roasting on coals isn't an easy or fast option, so I had to settle for our second favourite way of eating them - FRIED!

My sister loves them batter fried, but we also love them as crisps, however to make them healthy, I pressure cooked them first and then pan fried them, rather than deep frying them.

Once you pressure cook the sweet potatoes, you can refrigerate them (but layer a napkin or towel on top and bottom to absorb the condensation in the fridge) and slice up a few and fry as needed.

The quantities of spices to be used as completely on taste, so feel free to experiment.

Ingredients :
1 kilo sweet potatoes / shakarkhand - washed and all mud removed
fresh lime - to taste
salt - to taste
jeera / cumin powder - to taste
chilli powder - to taste
1/2 tsp oil to fry

Method :
Pressure cook the sweet potatoes / shakarkhand for 3 whistles. Don't overcook them, or they will turn mushy.
When cool, slice into 1/4" - 1/2" thick slices.
Heat oil in a pan, fry till crisp on both sides.
Turn off the heat.
Squeeze lemon and sprinkle salt, chilli powder and cumin powder to taste.
Eat as is for breakfast or a snack or eat it with rotis for a meal.

Monday, October 28, 2013

Recipe : Shan Masala Pork Chops


As you can see from the last few recipes, I've been busy, so I'm looking for fast cooking options. Pre-mixed masalas are of course a great way to help speed up the cooking process and the best thing with marinating meat is that once its all in the fridge, I just have to decide an hour before, what we want to eat and let it come to room temperature before I cook it.

I used the Shan Fried Chops/Steak masala for this dish. But although the recommended proportion was one packet mix to 2 kilos of meat, I used it all up on 1 kilo meat (it wasn't too spicy for us) and maybe next time, I would add some ginger and garlic paste to the marinade too. the vinegar wasn't part of the instructions, but more of a gut feel and I think it helped tenderise the meat and added flavour.

The taste is good and I think it will be great on fried fish too.

Ingredients :
1 kilo pork / lamb chops cleaned and dry
1 packet Shan Fried Chops/Steak masala
4 tbsps vinegar - I used Goan toddy vinegar
1/2 tsp oil

Method :
Marinate the chops in the masala mix and vinegar, at least overnight.
If you like thin chops, then pound and flatten them before marination.
Let them come to room temperature before cooking.

Warm the oil in a wide pan. Sear both the sides and then cooked either covered or uncovered until done depending on your preference for juicy or crispy chops.

These can also be cooked on a grill or a Barbecue.

Sunday, October 27, 2013

Recipe : Sevvaiyan Payasam / Vermicelli Kheer

I've posted a recipe for Vermicelli Kheer before, actually around 3 years back. Much has changed since then, we have become a little more health conscious since then, cream and sugar are being minimised in our diet and we are trying to find lighter alternatives to heavier foods.

This is a really fast recipe, there's absolutely no chopping or anything required. simple ingredients, simply made.


Ingredients:
1 packet vermicelli (roughly 175gms, little less is better than more)
1 litre milk
2 tsps sugar
1 tin milkmaid
100 gms cashewnuts
2 tsps ghee / semna / clarified butter (substitute with white butter if you need)
a pinch of powdered cardamom seeds (optional)

Method :
In a wide mouthed pan, heat the ghee.
Fry the cashewnuts in the ghee and when browned, take them out of the pan.
Now roast the vermicelli in the same ghee.
Once the vermicelli is browned, add the milk haltingly (so that it doesn't clump) and keep stirring.
When the vermicelli is half cooked, add the sugar and then the milkmaid and keep stirring and scraping the sides where the milk turns sticky.
When almost done, add the cashewnuts, give it a light boil and turn off the fire.
Sprinkle the powdered cardamom on top if you like.
Serve hot or chilled.

Saturday, October 26, 2013

Recipe : ITC "Kitchens of India" - Hyderabadi Chicken Biryani


I love the food at most of ITC's restaurants, I have also tried their ready to eat Dal Bukhara which was quite good and the Mirch Ka Saalan which was ok.

So with the new range of pre mixes out, I picked up the Hyderabadi Chicken Biryani mix.

What i really loved about this premix, was that there was absolutely no chopping to be done. The recipe was extremely simple.

Add the pre-mix to curd/yoghurt, add the meat. Marinate.

Cook separately, layer with cooked rice and serve.

The meat was marinated overnight and I was really excited. I'd used my hands to mix the masala, yoghurt and meat and the fragrance of spices on my fingers were extremely enticing and lasted long after I had washed my hands, done the dishes and had a bath. So I was really, really looking forward to the end result.


As usual, I skipped the layering and cooking separately and went my most comfortable way (less washing up, faster production) of semi cooking the met in the pressure cooker. Add rice and water, stir and cook for 3 whistles, letting the steam escape on its own.

However, the final biriyani, did not have half the taste, that the original masala promised. I'd added a couple of chillies, but the biryani still wasn't spicy enough. The flavour did not penetrate either the rice or the chicken.

It did look and smell good, but the taste wasn't up to the normal ITC standard. This is not a product that I would buy again. Shaan Memoni Mutton biriyani mix is still firmly my favourite so far.

Friday, October 25, 2013

Recipe : Jazzed up Tagliatelle Aglio Olio (Vegan Option possible)


We had a lovely trip to Italy in September and the food there was outstanding. While most people visiting Italy shop for shoes and bags and clothes, I was in the market for cold meat, pastas and cheese. Peck in Milan is heaven on earth for someone who loves to cook. Their produce is so good and of such high quality and they do an amazing job of packing cheese in a way that it doesn't spoil when you carry it on a regular flight back to your home country.

This was a dish that I rustled up on a lazy Sunday, when I really didn't want to cook too much and it can be easily made using ingredients available in your own kitchen. I just added the meat, veggies and cheese into the same dish to make it a well balanced one pot meal.

By skipping the meat in my recipe, you can adapt this for vegetarians and to turn it vegan, just avoid the cheese (but remember to use vegan pasta) and try to cut all the ingredients to the same size for uniformity.

Ingredients :
500 gms pasta (I used tagliatelle, you can use any flat pasta, or even a fusili)
2 - 3 tsps olive oil
10 - 12 cloves garlic chopped (depending on your taste)
2 tsps chilli flakes
200 gms cold meat chopped in cubes (I used mortadella, but you can use any available cold meat that you have
200 gms mushrooms cubed
2 red peppers cubed
salt to taste (remember to adjust for the salt in the cold meat and cheese)
cheese to garnish (I used a lovely wine infused pecorino, but regular parmeggiano reggiano will do)

Method :
Boil the pasta in a pot to your required level of doneness.
In a wide pan, fry up your cold meat till done, remove and keep aside.
Fry the mushrooms until cooked and keep aside.

Take 2 tsp olive oil in the hot pan and brown the garlic in it, then add the chilli flakes.
Lightly saute the red peppers in this and then add the meat and mushrooms.
Stir well, adjust salt to taste and add the cooked pasta to the pot and mix well.
Serve hot, garnished with grated cheese.

Tip:
If you want to add any additional herbs, add them in just before the chilli flakes.


Thursday, October 24, 2013

Recipe : Maffe Tiga / Tiga Degae / African Chicken Peanut Butter Soup


I'd seen the recipe for African Chicken Peanut Butter Soup on Kadi's African Recipes, a couple of months ago and thought that it would be fun to make, so I'd bookmarked it.

Today, I was looking to make something "different" and remembered this recipe and since I had an open jar of peanut butter in my cupboard, our meal tonight had an African twist, which we quite enjoyed.

In her introduction, Kadi says "African peanut soup is enjoyed in many West African countries including Senegal, Guinea and Mali. The soup is also known as Maffe Tiga or Tiga Degae, there are a lot of varieties of peanut butter soup, it can be made with beef, fish, chicken or completely vegetarian."

While Kadi calls it a soup, it has the consistency of a curry / gravy and goes well with rotis and rice. Kadi also has a step by step video to make this dish uploaded on youtube. If African food interests you, do follow Kadi's Channel on youtube.

I have tweaked Kadi's recipe to adjust for our own tastes and to accommodate the ingredients that I had on hand.

Ingredients :
1kg chicken legs
2 tsp oil (and some leftover pork fat from some chops I fried the other day)
3 fresh tomatoes chopped
2 tbsp tomato sauce
2 onions chopped
6 garlic cloves chopped
8 green chillies - 4 chopped & 4 split
1 tbsp black pepper coarsely pounded
1 bouillon/soup cube
4 tbsp creamy peanut butter (not chunky)
3 cups (750ml) water
salt to taste

Method : 
Warm a wide mouthed pan and heat the oil in it.

Brown the chicken on all sides in this oil (fry in batches if necessary, but don't overcrowd the pan) Be careful, the oil will splatter, when the chicken releases its juices.

Remove the browned chicken and in the same pan and oil, add the tomatoes, tomato sauce, onions, garlic, the 4 chopped green chillies, black pepper and soup cube.

Fry it for about 10 minutes until the mixture becomes mushy.

Now, add the water and peanut butter and simmer on a low flame, stirring well until all the peanut butter is dissolved. Let it cook for about 15-20 minutes on a low flame, keep stirring to prevent the peanut butter from sticking and burning.

Add the 4 slit green chillies and salt to taste and simmer for another 5-10 minutes till it smells cooked.

Now add the fried chicken and simmer the mixture until the chicken is completely cooked, stirring frequently.

Serve hot with rice or rotis.

I loved the curry with plain rice, but my husband found it a little sweet with the rice, he preferred it with phulkas.

LinkWithin

Related Posts with Thumbnails

ShareThis