Showing posts with label Side. Show all posts

Wednesday, August 19, 2020

Recipe : Pork Chidkan / Kodava Pandi Chidkana

I first tasted chidkan in Bangalore last December when @spiceupthekari ordered it in for me from Kodava Samaja.

It was instant love at first bite! I searched high and low for a recipe for the last 8 months to no avail. Requests to Kodava friends were unsuccessful and I was wondering how to entice the chefs at Kodava Samaja to part with the recipe on my next trip to India. 

My general enquiry into this seemed to indicate that this is a recipe mostly made as a bar snack.


Then last week, I listened to @historywali chatting with @pigout_coorgkitchen and when I checked out Anjali Ganapathy's insta, I found a recipe that looked extremely promising.

Below is a pic of Anjali's original recipe on instagram at @pigout_coorgkitchen. I highly recommend following her for accessible insights into Kodava cuisine.

 
We haven’t been getting a wide variety of pork cuts during lockdown, but I found some Kassler chops that had the right fat meat ratio, so that’s what I used.

A bit of smokiness and saltiness in this brined meat, worked quite well even in the finished product.

I fried the cooked pork in a tbsp of oil, rather than deep frying it, but I still got a good crispness.

No access to parangi malu or jirgi mirsang, so I used the spiciest green chillies available here in Joburg.

This recipe may not be as famous as pandi curry, but is definitely a keeper and will be made often. Thanks so much Anjali!

I first thought I'd turn the water the pork was cooked in, into soup, but then I cooked moong dhal with that pork flavoured water for the same dinner, which just added oodles of umami flavour.

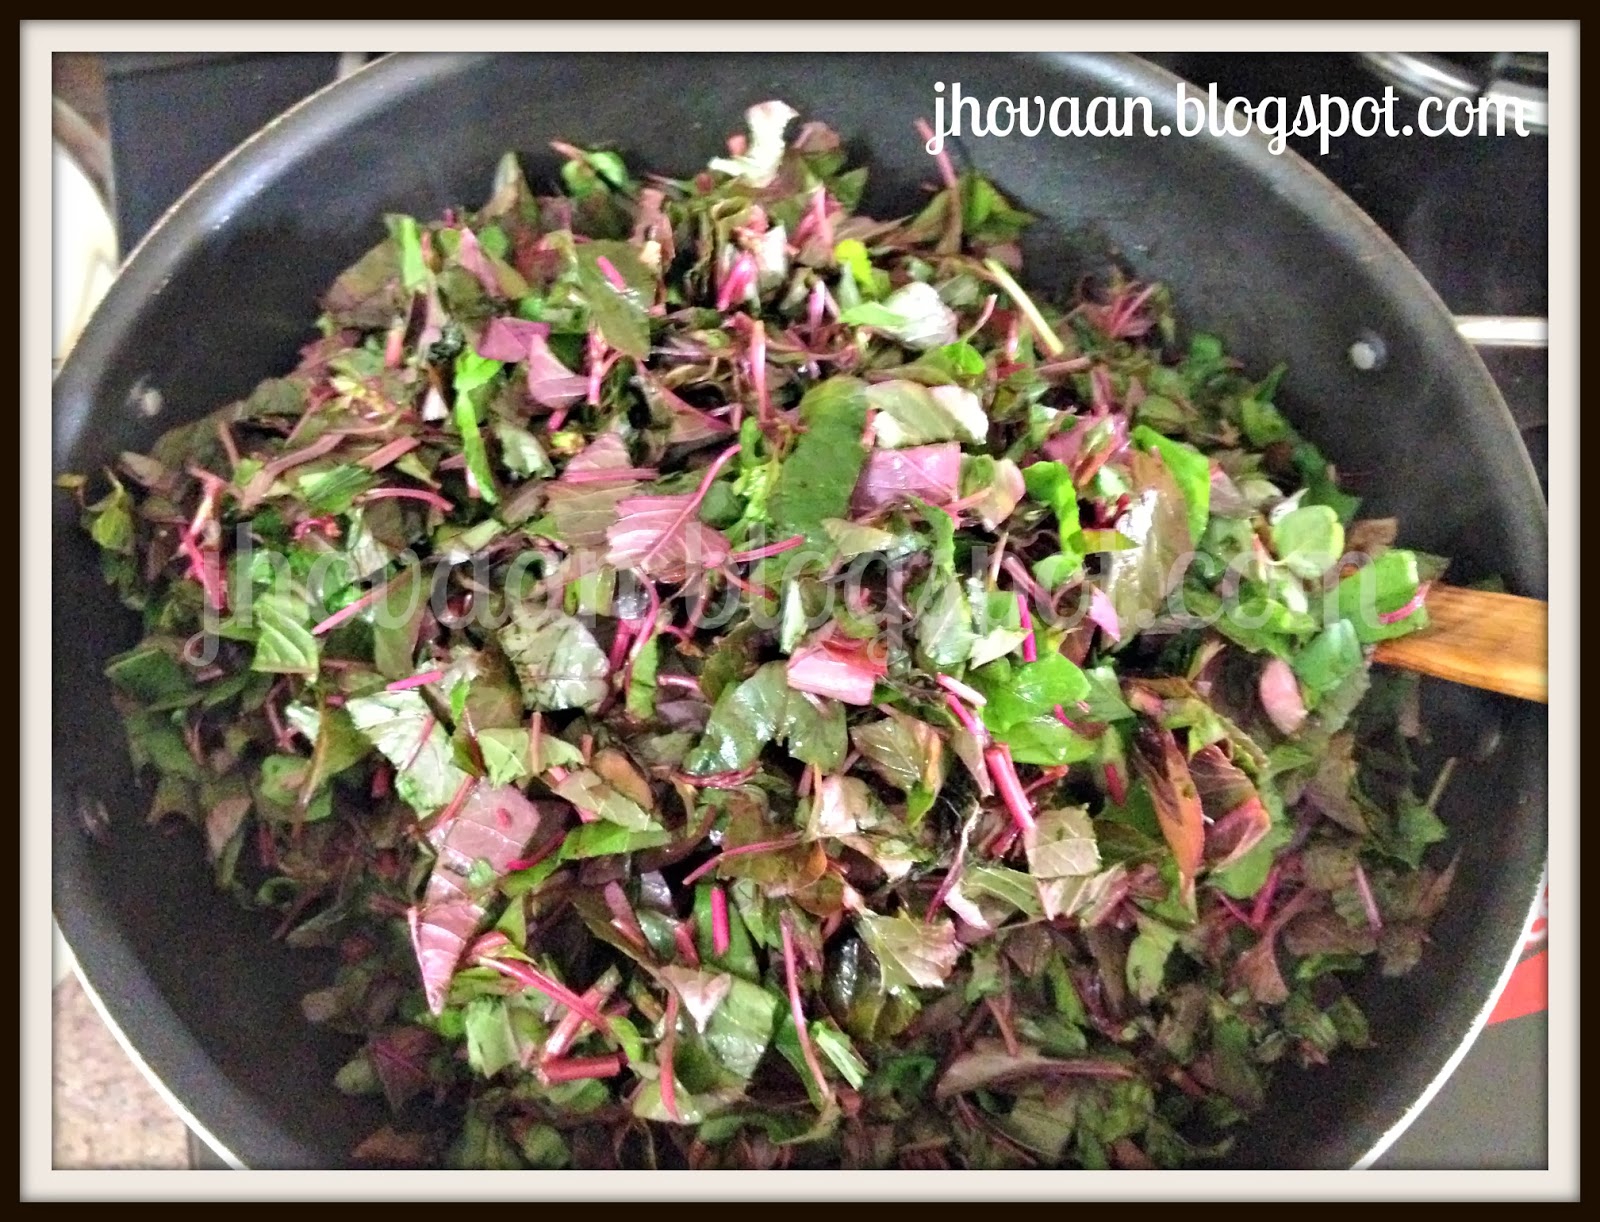
I also served Gomen / Hamli / Collard Greens with this dinner


Very very satisfying dinner indeed.

Do not be tempted to cook more than 250gms of pork per person as this dish needs to be consumed immediately after cooking, otherwise it just won't work - it will turn too hard.  

This is how I cooked it with my substitutes. 

Ingredients:

500gms boneless pork with fat  - chopped in 1 inch pieces - don't stint on the fat, it gives lovely crispy fatty flavour and texture. I used kassler chops, sorpotel cut works too

1.5 cups water 

7-8 green chillies, the spiciest you can find if you have no access to parangi malu / jirgi mirsang / birds eye chilli

2 cloves garlic

a pinch or 2 of rock salt ( I used less since kassler chops are smoked and brined) 

lemon / lime juice


Method :

Boil pork with 1.5 cups water in a pressure cooker until 3/4 cooked (Anjali recommends approx 2 whistles on high).

You can either chop the pork and then cook or cook the pork and then chop, whatever works better for you. 

Drain all water from the pork. 

The water can be used as stock, for a soup or I just cooked the dhal for dinner in it. 

As the pork is drying, make a fresh coarsely ground paste of  green chillies, garlic and salt (feel free to adjust quantities to your liking, this ratio worked well for us) - think thecha.


In 1 tbsp oil fry the pork, it will also release a fair amount of oil. This is going to spatter

Remove the pork from the oil (I ended up with about 2.5 tbsp oil + fat which went into tadka for the dhal)

Mix the ground chilli paste into it and squeeze lemon / lime juice generously. I used half a large lemon.


Serve immediately and be transported into heaven.

This dish is served as a snack / "tastings" with drinks, but it worked well for our dinner too.

This is exactly the version I had from Kodava Samaja. I have another half kg of the pork chops left, which I'm thinking of cooking into another version of chidkana that Anjali has shared, but that one uses kachampulli vinegar.

Recipe : Hamli / Gomen - Eritrean / Ethiopian Greens - Vegetarian - (Vegan Option)

I first tasted Hamli at Mosob in London - we have eaten so many meals here and taken so many friends to this place to introduce them to Eritrean food.

Hamli and Gomen (the Ethiopian version) are on the menu of most Eritrean and Ethiopian restaurants in London.

When I visited Ethiopia last year, I also got to taste a few versions made with niter kibbeh or tesmi - a spiced clarified butter, which obviously adds layers to the taste. I make it with regular ghee (Indian clarified butter) which is a mild cop-out but still very very flavourful.

Given the fantastic 3 day workshop on Desi Cultures that I attended last weekend, I may just venture to make ghee at home myself and if I can find the spices, I'll try making a bit of niter kibbeh too.

Mosob makes their hamli with spinach as it is easily available in the UK, however the traditional recipe calls for something closer to collard greens.

The last packet of spinach I bought at the grocery seemed more collard greens in texture and smell than what we commonly know as spinach, which is when I remembered this recipe that I hadn't cooked in a while. 

Collard greens give you a much more substantial texture without any slipperiness, kale works well too. But I've cooked it with regular spinach in London and that is also good. 

Ghee is low in lactose and milk solids, hence keto friendly, so this recipe works for a keto diet too. 

Vegan Version:

A lot of the flavour of this dish comes from the niter kibbeh or ghee, but if you want to keep it vegan, use any suitable cooking oil


Ingredients: 

2 tbsps niter kibbeh or ghee 

1 onion - chopped

2-4 cloves garlic - chopped

1.5 tsp minced ginger 

1 tsp jeera powder (cumin) 

1 tsp dhaniya powder (corriander) 

1 bunch collard greens / kale (about 350-400 gms) (If using regular spinach - 500 gms because this wilts much more) - roughly chopped. 

 - if you have very thick hard stems, remove them and use them in stock or tehri or any dish that gets cooked for a longer period of time. 

Salt to taste 

a little squeeze of lemon - optional 


Method: 

Heat 1 tbsp niter kibbeh / ghee in a pan. 

Add chopped onions, cook for 2-3 minutes until transluscent. 

Add, garlic, ginger, cumin and corriander, saute for 2-3 minutes. 

Now add your greens (collard / kale / spinach) with another tbsp of niter kibbeh / ghee. 

As it cooks down, add salt to taste. (remember greens wilt and hence the volume once cooked, will be much lower than what you start with - salt accordingly) 

Cook to your level of doneness - with kale and collard greens, I let it get a bit crispy, with regular spinach crispiness doesn't work as well. 


Traditional preparation does not include a squeeze of lemon, but:  

Kim's Nana's Tip: Lemon helps the body absorb iron from the greens more easily, something about Vitamin C making the soluble iron absorption into the body easier, so I always add a squeeze of lemon whenever I'm cooking green leaves. 


In the picture above, I've served it with rice, moong dhal and pork chidkan. This recipe pairs well with rotis and dhal too.


Monday, August 03, 2020

Recipe : Dahi Ke Kebab - Vegetarian

Rakhi special - Dahi ke kebab / Yoghurt kebabs.

Rakhi / rakshabandhan is an Indian festival that celebrates the sibling bond. This also includes cousins and friends who feel like family.

I'm trying to test our willpower on how much sweet & deep fried stuff we can avoid, now that the Indian festive season has kicked off. Given that we will not be able to visit anyone or have anyone over, I’m hoping it won’t be too hard this year.

So instead of making something sweet I tried something new for rakhi - these dahi & paneer kebabs.


I first tried them in a restaurant in Rajasthan and the meltingly soft, mildly flavoured kebabs were a revelation. The subsequent ones that I've had across Rajasthan & Punjab could never measure up to my initial experience, but this recipe came quite close

Excellent as a tea time snack or to turn into sandwiches or rolls.

Ingredients :
2 cups hung curd + paneer

For a true dahi kebab, you need to use 75% dahi and 25% paneer.

I’d made fresh paneer at home and when hanging it, I added some soured up yoghurt too, So it ended up a 50:50 paneer and dahi mix. Which meant the kebabs were marginally grainier than they should have been..

1.5 - 2 tbsp of besan / chickpea flour - roast till fragrant
1/2 medium onion finely chopped
2-5 green chillies finely chopped
1/2 tsp ginger paste
1 tsp jeera / cumin powder
salt to taste
1/2 - 1 cup breadcrumbs
Oil to fry

Method :
In a large bowl, mix the hung curd and paneer, this should be very dry.

If your paneer isn't the crumbly variety, then grate it before mixing with the dahi, so you get a smooth paste.

Mix all the other ingredients into the paste except the oil & breadcrumbs.

It should be dry enough to hold its shape and fry, if it isn't dry enough, add more roasted besan.

Form shapes of your choice - flat tikkis / cylindrical or soccer ball shaped croquettes.

Since I shallow fry, I prefer the flat tikki shape for even cooking.

You can either shallow or deep fry these kebabs.

Heat a pan and then heat some vegetable oil in it.

In a flat plate, take the breadcrumbs. Roll the kebabs in the breadcrumbs and then fry on medium heat for about a minute each side till done.

You only need to crisp up the outside, not cook the inside.

Serve hot with green chutney or ketchup.

So yum!


Kim's Tips :

I didn’t have a stock of breadcrumbs and I didn’t feel like making some after my last disaster (over dried the bread, the mixi cover flew off and I spent half the day cleaning the breadcrumbs that had flown all over the kitchen), so I rolled them in rava/ soji / semolina before pan frying them.

Dahi kebabs are normally mildly flavoured, so the flavour of the yoghurt can shine through.

You also want to use minimal spices to preserve the white colour of the mix.

But if you want a stronger flavoured kebab, go ahead and add spices as per your taste - garam masala / amchoor / kasoori methi / cardamom powder / fresh chopped coriander / nutmeg powder are all good variations.


Sunday, June 09, 2019

Recipe : Kala Channa Chaat - Black Chickpea Salad - Vegan

Ever since last Wednesday when the husband sent me photos of pani puri and other chaat that he had at Southampton at the match, I’ve been craving those flavours. Today’s salad was an attempt to capture the balance of sour, spicy, salty, crunchy without the sweetness.


I used kala channa - legumes like channa are not allowed on the keto diet because they do contain carbs - but we are on a slightly more flexible diet - for us no carb means avoiding grains, flour and high starch veggies.

Kala channa / Black chickpeas have a low glycemic index, and high fibre and protein so I will occasionally slip it in.

If you are following strict keto, avoid the black chickpeas. If you avoid the black chickpeas, this dish works for the raw food diet too.

The black chickpeas are more nutritious, but white chickpeas will also work in this recipe.

So, the salad is
1 bowl drained black chickpeas (you can use canned or soak overnight and cook the next day)
1 bowl chopped cucumber
1/2 bowl chopped tomato
1/2 bowl chopped onion,
2-3 sprigs coriander chopped
1-5 chopped green chillies (as per spice tolerance)

The dressing is
2 tbsp lemon juice,
1 tbsp chaat masala
1 tsp black salt (use regular salt if you don't have black salt)
Feel free to adjust the quantities to suit your taste.

I let the salad and dressing sit for awhile.

Just before serving, I tossed in a handful of groundnuts.

Kim's Tip : If the taste of raw onion is not a flavour you like, drop the onion completely or let the onion sit in the lemon juice / vinegar for 10-15 minutes which helps take the edge off.


The lamb kebabs were from @meatn16 that I picked up after a session of the @stokenewingtonliteraryfestival at their location.

The meat was fantastic. I just seared it on all sides and served it medium rare.

Thursday, May 23, 2019

Recipe : Bean Sprout Salad (Vegan)

This salad is bean sprouts.

2 minutes stir fried in a hot pan (any more and you will lose the liquid as they start to turn soggy and soft). I’m not a fan of their raw taste, so just about 2 minutes.

You can use them raw if you like.


Dressing
2 tsp lime juice,
1 tsp soya sauce,
1 tsp chipotle chilli flakes,
1/2 tsp Chinese all spice powder
1 tsp of hazelnut oil - I need to finish this bottle, any olive oil or salad oil will work too.

Toss gently.

I served it warm, because sprouts once heated can turn soggy quite quickly.
It barely takes 5 minutes to put it together.

So glad the weather is turning warmer and we can eat a lot more salads.

I served it with a Texan slammer - jalapeƱo poppers with cheddar cheese, encased in pork mince / sausage meat and rolled in bacon from @marksandspencer Lightly pan fried at home.


Friday, October 13, 2017

Recipe : Nandini style Andhra Chilli Chicken

For our entire friend circle, Nandini in Bangalore is iconic for its Andhra Chilli Chicken served with Andhra Chicken Biryani. The biryani itself is quite mild, but the chilli chicken is absolute dynamite.

Thanks to a friend on one of the many facebook groups that I follow, I finally found a recipe that works brilliantly. All thanks to Rashmi Shenoy who shared her recipe on Konkani Amchi Food.
When I told my sister that I had found a recipe that was perfect, her first reaction was "Oh, so you won't be needing my courier services anymore!" Yes! That is how much we love this combination! When we lived anywhere else in India, this was what we would ask friends and family who were visiting from Bangalore to bring for us. The chilli chicken freezes well and can be reheated as you like.


I have made a few changes to Rashmi's recipe to adjust for flavours that I don't like (I don't use ajinomoto). She doesn't have a blog of her own, but you can see the original recipe from her, here.

This is a super spicy  recipe, so do not attempt unless you have a high spice tolerance.

Warning :
Better if you can keep your kitchen windows open and kitchen door closed.

Keep a box of tissues on hand. I think I used up about 20 before I was done cooking.

Do not, I repeat, DO NOT TOUCH your eyes while cooking!

I don't think, I've ever posted a warning before posting a recipe before.

Ingredients :
1kg Chicken with bones (curry cut is best, I found the legs and thighs too large for the flavours to permeate)
30-40 Green chillies - grind into coarse paste (yes, thirty to forty)
10-12 Green chillies slit or whole
2 tbsp Vinegar
1 tsp Soya sauce
1 tbsp lemon
Salt to taste
3-4 tbsp Cornflour
3-4 tbsp Water to make the cornflour paste.
2 tbsp Oil
2 tbsp Ghee

Tip : you can use garlic (10 cloves)& ginger 1" pieces while grinding green chillies.
I did it and enjoyed the flavour

Method:
Marinate the chicken with soya sauce, lemon juice & 1/2 tsp salt for 30 minutes.
Coarsely grind the green chillies (and ginger and garlic if using)

Heat a deep pan (for 1kg chicken, take a pan that can hold 2 kgs).
Add oil& ghee.
Once the ghee melts, add the whole / slit green chillies and fry for a minute till it turns white on the outside.
Now add the green chilli paste & fry well.
Protect your nose and eyes.

Once the oil separates from the sides, add the marinated chicken & fry for sometime.
Add a little water and let it cook for 20 minutes on low heat.
Adjust salt to taste.

Add the cornflour paste & vinegar.


The Andhra Chilli chicken is ready to be served with Nandini style Andhra chicken Biryani and Onion Raita

Friday, March 04, 2016

Recipe : Pan Seared Scallops with Chipotle Butter

This is a very quick and easy recipe, that takes less than 10 minutes to put together.


Ingredients :
200 gms cleaned fresh scallops.
2 tbsp butter + few drops oil
2 tbsp garlic chopped fine.
1 tbsp chipotle flakes (substitute - red chilli flakes)

Method:

Rinse scallops and pat them dry with paper towels before cooking. They won't brown if they have too much moisture on the outside.

Heat a little butter in a pan with a few drops of oil (to prevent the butter burning)

Fry some finely chopped garlic in the butter.

Once it crisps up, add some chipotle flakes (chilli flakes can be used, but the chipotle has a sweet smoky flavour, not just heat)

The flakes burn quickly and scallops cook quickly, so you need to move fast.

On high heat, sear the scallops on both sides (a few seconds), then lower the heat and cook gently till they are done (2-4 minutes depending on thickness).

Look for the scallops to  just about turn opaque. If you overcook them, they will become tough.

Take the scallops out of the pan, cook the remaining liquid in the pan until it thickens to a sauce like consistency and pour it over the scallops.

Serve fresh and hot.

Options:
You can make this recipe with fresh prawns or any light fish

Thursday, August 07, 2014

Recipe : Roasted Pumpkin (Vegan)

When we visited Canada a couple of years ago for a cousins wedding, we had a BBQ at U Ossie & Aunty Aureen's house and one of my (many, many) aunts - Belinda (who hates being called "Aunty" by me cause it makes her feel "old" LOL) roasted some butternut squash which was amazingly tasty.

Seeing that we don't get a variety of squashes in India, I hadn't had the opportunity to try making this myself. Today though, I saw some lovely red baby pumpkins in the market and remembering this recipe, I picked one up.

Sadly for me, the pumpkin wasn't ripe enough, so the end product was missing the sweetness, but I think the flavours worked very well and I will ask for help to select a ripe pumpkin next time and retry this recipe.

I could have added some brown sugar to this while baking, but this week is diet week and sugar and sweeteners are off the menu.

Its quite easy to assemble and takes about 10 minutes to prep (depending on the size of your pumpkin) and then another 45 minutes in the oven that you can use to prepare the rest of your meal or just have a bath or a glass of wine while the pumpkin is roasting.

Ingredients :
1/2 kg ripe pumpkin or Squash
6-8 cloves garlic chopped
1/2 tsp cinnamon powder (you can also use all spice)
1 tsp chilli flakes
sea salt to taste
1/2 tsp of olive oil

Method:
Preheat your oven to 180C / 355F.
Clean and chop the pumpkin (you can retain the separated seeds for roasting)
Place the pumpkin pieces in an ovenproof bowl
Add the chopped garlic, cinnamon powder, chilli flakes, sea salt and olive oil.


Toss or stir till it is all well combined.
I used my hands and gave all the pieces a light massage with the spices.
If you feel the pumpkin isn't sweet enough, add a bit of brown sugar too.


Roast in the oven for 30-55 minutes.
(if you have cut your pumpkin into chunks, it will take closer to 55minutes, if you have sliced it fine, it should be done in around 30 minutes - ripeness of the pumpkin is also a factor in how long it will take to cook)
Serve hot

Kim's Tips for Leftovers :
While, I was roasting the pumpkin in the microwave, I placed the seeds in an ovenproof glass lid and slid it under the wire rack on which the pumpkin dish was placed. The roasted seeds can be lightly seasoned and eaten as a healthy snack or tossed into salads where they provide fibre and crunch.


If you don't feel like eating leftover roasted pumpkin for a second meal, give the pumpkin a whiz in the food processor until finely blended. Add some chicken or vegetable stock (till you get your desired consistency) and bring to a boil with some fresh herbs and cream to garnish.

You can even mix the roasted pumpkin pieces into a green leafy salad for an alternate texture and a sweet flavour that goes well with bitter leaves.

Kim's Tips:
While I piled all the pumpkin into one dish (given the limited size of my microwave oven), the better spaced the pumpkin pieces are, the better will be the caramelisation of the pumpkin.

The skin adds fiber to the dish, but you can remove it if you prefer.

This post is also being submitted for Round 2 of the Indiblogger & Borosil #BeautifulFood Competition

Thursday, July 17, 2014

Recipe : Goan Choriz Fry

This is the simplest of all the choriz recipes that I know. My mum often made this at home and served it as a side with rice and dhal.

My friend David, used to get really good quality choriz, which he used to cut like regular sausages and then serve a piece of sausage and a piece of potato on a toothpick as an appetiser with drinks.

This is really very quick to prepare when you are in a hurry to create a protein side dish as the choriz is always stored at room temperature. Its actually faster to prepare than the accompanying Goan/Manglorean red rice.


Ingredients:
250 gms Goan Choriz
2 large onions chopped
2 medium potatoes peeled and chopped
chopped coriander leaves to garnish (optional)

Method :
In a wide pan, place the sausages flat.
Add onions and potatoes to the pan
Pour in a thin layer of water so it comes up to half the height of the sausage.
Cover and cook till potatoes are done, stirring occasionally
Slit the skin and de-string the sausages if necessary and continue to cook it with the cover open, until the water all dries up and the potatoes start to crisp up.
Serve hot with pao bread or rice and dhal.

Note:
You can chop the potatoes smaller. I chop them slightly larger, so that those who are on a "no carb diet" at home can pick them out and keep them aside. :)

Monday, June 23, 2014

Recipe : Gharwala Rajma - Indian Homestyle Kidney Beans (Vegan)


Rajma in some ways is comfort food for me, which is strange. Mum and grandma hardly ever made Rajma when we were growing up (since our diet was primarily non vegetarian, we did not need the proteins from lentils/dhals, when a tastier meat, egg or fish curry was almost always on the menu) except occasionally in the monsoons, when fish wasn't available and to have a change from meat.

But we kids often turned up our noses at dhals in those days and much preferred the humbler saar / daali thove - a thin lentil dish, to the time and effort intensive rajma or channa. So, obviously mom and nana, hardly cooked with rajma.

When I was in hostel in Jamshedpur however, rajma was on the menu once a week and this was one of the few dishes that was made in the mess that went well with rice, so I hardly missed a meal when rajma-chawal was on the menu. I later had much better tasting Rajma, cooked by mothers of my Punjabi and UP friends when they knew that a South Indian rice-eating girl was headed to their home for a meal. My husband's mom and maami (mothers brothers wife) make some kick-ass rajma too.

This recipe however, is my own. You can stir in some cream in the end if you want to make the whole thing creamier. I prefer stirring in some smoothly beaten yoghurt/dahi to keep it low fat. But it can be served as is, especially if you want to keep it vegan.

You do get "rajma masala" powders in the market, my Mother-in-law feels that the "meat masala" powder works very well with Rajma. In a pinch, I have also used "channa masala" powder. Most Indian mixed-masala powders would work reasonably well with this dish. Ideally the masala powder will have a bit of powdered amchoor (dried mango), jeera (cumin), haldi (turmeric), dhaniya (coriander), cinnamon and chillies. You can use any masala powder that has these spices and maybe a  few more, don't worry about it too much.

How much masala you add will depend on which brand you are using, how strong their masalas are and how spicy you like your food. So keep stirring, smelling and tasting to find your balance.

Ingredients:
2 katoris / 150-200 gms rajma / red kidney beans
3 medium onions
5-10 chillies to taste (according to its spiciness and your spice tolerance)
10-12 cloves of garlic
2 inches ginger (1 inch for grinding, 1 inch julienned for tempering)
5 red tomatoes or 200 ml tomato puree
1 tbsp oil
pinch of hing (asafoetida)
pinch of methi (fenugreek seeds)
1 inch cinnamon
1/2 tsp jeera seeds
1-4 tbsp rajma masala (to taste - depends on brand. See above)
2 tbsps chopped fresh coriander to garnish


Optional : 
2 tbsp smooth cream or smoothly beaten yoghurt

Method:
Soak the rajma for 8 hours / overnight and pressure cook till done.
Discard the water that rajma is boiled in. This is the only dhal whose cooking water we discard.

Grind the onions,  half the chillies, garlic and half the ginger to a smooth paste.

In a large pan, heat the oil.
Add the hing and methi seeds (this with the jeera, helps reduce the gassiness caused by rajma)
As the seeds start to brown, add the cinnamon and the jeera seeds.
When the jeera seeds splutter, add the julienned ginger and fry till it crisps up.
Now add the ground onion paste and fry on a slow flame, till the onion paste is cooked.

In the meanwhile, grind the tomatoes in the same mixi that the onion paste was ground in.

When the onion paste is cooked, add the tomato puree (fresh or packaged) and the rajma masala and cook for a few minutes.
Slit the remaining green chillies and add to the curry paste.
Rinse the mixi in a little water and add this water to the curry.
Cook on slow flame until there is no raw taste left.
Now add the cooked rajma.

Let it bubble away on a slow flame for 5-10 minutes.


Take it off the fire and add the smoothly beaten cream or yoghurt if using.

Garnish with chopped coriander and serve hot with phulkas or rice.

I love serving this with a side of onion raita and we have shifted almost completely to brown rice at home now.


Thursday, March 20, 2014

Recipe : Instant Mango Pickle (Vegan) - Tamilian Green Mango Curry

This is a recipe that a Malyali friend told me about ages ago. I end up making it almost every summer (multiple times) as soon as green mangoes are available in the market.

Edited on 27 Mar 13 to add:
Once I posted this recipe, I was told by 2 different Tamilian friends (with absolutely no connection to each other) that this is a summer staple at their home and its called Mango curry.

The trick to making this pickle that is instant (no sunning, brining etc required) is to choose green mangoes that have the right amount of tartness for you. If they aren't sour enough, add some vinegar or lime juice to the mix, but its best to get sour mangoes.

You can make this in as high or low a quantity as you feel like. I make quarter to half kilo at a time and refrigerate it for the week. Longer than that, and it tends to soften and lose its crunchiness.


Ingredients :
250 gms of chopped green mango (if the seeds in the type of green mango you are using are very large, then use more)
1/2 tsp mustard
1/2 tsp jeera (cumin)
sprig of curry leaves
1 tsp of coconut / sunflower / mustard oil (whatever you prefer)
salt to taste
chilli powder to taste (I use around 2-4 tsps depending on the sour spicy balance I want)

Method:
Heat the oil in a pan.
Add the mustard and jeera.
When it splutters, add the curry leaves and chilli powder.
Turn off the flame, and add the mango pieces.
Stir well and add salt to taste.
Stir well again and keep aside for awhile to let the mango absorb the flavours.
If the pickle isn't sour enough for you, add lime juice or vinegar.

Serve at room temperature with your meal.
It goes best with curd rice on a hot summer afternoon.


You can refrigerate the leftovers and serve slightly chilled whenever you want a spicy side with your meal.

Wednesday, March 19, 2014

Recipe : Assamese Style Pork Fry

Delicacy in Guwahati was my favourite Assamese restaurant for simple home style food. Their pork fry and pork patot diya (baked in banana leaves) were my favourite items on the menu.

I've been craving that pork fry so much since I left Guwahati, and neither of my North East recipe books (Penguins - The Essential North East Cookbook and Ambrosia from the Assamese Kitchen) seemed to have the recipe that I was looking for. So I requested my friend Sanjukta, who is Assamese if she knew a recipe for this dish. Sanjukta currently writes a Food Column for G Plus - a weekly news magazine in Guwahati.

She gave me a simple straightforward recipe, that I used as a starting point for my pork fry.
"Marinate pork in crushed ginger and garlic, salt, pepper and some red chill powder. Now take the marinated pork in a wok and cook on low flame for over an hour. Keep stirring from time to time to avoid burning of the meat Now once it's done, chop onions and fry it it little oil in high flame. Add some haldi if u want. Add some chopped green chillies and stirring add the cooked pork into it. Add some more salt if required. Fry for some more time until done"

My recipe follows. I used 20 green chillies and didn't find it as spicy as I remember, so I added another 10 towards the end. If you don't like your food spicy, you can ignore the green chillies completely or lower the quantity.


Ingredients:
2 kg pork cubes - about 1" size (I used a mix of 1 kg ribs and 1 kg boneless to get a good ratio of meat and fat, but any curry cut should be fine)
4 tbsp ginger garlic paste (freshly pounded is a better option, but packaged will do)
2 tbsp garlic paste
2 tbsp pepper

1 tbsp vinegar
1 tbsp chilli powder
1.5 tbsp salt
1 tbsp mustard oil
2 large onions (roughly chopped)
2 medium potatoes (chopped same size as pork cubes)
1 tbsp turmeric (haldi) powder
30 green chillies (slit - optional or adjust to taste)

Method :
Marinate pork in ginger garlic paste, garlic paste, pepper, vinegar, chilli powder and salt at least for an hour. Overnight or longer is a better option.

Heat the oil in a large pan or wok (the more surface area, the better)

Put the fat pieces in the pan (not the meat, so the fat cooks for longer and starts to break down)
Once the fat starts to break down, add the onions and potatoes and let the potatoes fry a bit in the fat.

Add turmeric, half the green chillies and mix well.

Then, add the meat and fry on a low flame till well cooked.

When almost done, add the other half of the green chillies.

Dry it completely and let the meat crisp up a bit.
Serve hot with rice and dhal.

Kim's Note:
If there is any meat leftover, reheat it with some water, it will form a thick curry and garnish with coriander leaves and serve with rice or rotis.


Served here with Kabuli Channa Pulao and Raita

Sunday, March 16, 2014

Recipe : Pedatha's Iguru Pachchadi - Milky Brinjal Chutney

This recipe is from Jigyasa & Pratibha's Other Book - "Cooking at Home with Pedatha"

Its an interesting variation on the regular Baingan Bharta and goes well with rotis or rice and dhal.
Ingredients :
1 large or 4 small tender brinjals (minimal seeds)
1/2 cup boiled and cooled milk
1 tbsp oil
salt to taste

Tempering :
3/4 tsp dhuli moong dhal (split and husked black gram)
1/2 tsp mustard seeds
2-3 green chillies slit
1/2 tsp grated ginger
1 tbsp coriander leaves, finely chopped
6-7 curry leaves

Method :
Coat the brinjal with a little oil and roast directly on flame till skin turns black and starts crancking.

When cooked through, scrape off the skin and mask with a fork.

When the pulp has cooled, add milk and mix well.

Heat oil for tempering, addthe dhal, when it turns golden, add mustard.
Turn the flame off and add other tempering ingredients.

Mix the tempering into the pulped brinjal and mix well.

Add salt just before serving, so that the milk doesn't curdle.

Friday, December 20, 2013

Recipe : Gujarati Style Fresh Turmeric Pickle - Kaccha Haldi / Amba Haldi Achaar (Vegan)

Come end November - December and the laaris (local hand carts) in the markets of Gujarat have a corner dedicated to Rhizomes -  kaccha haldi (tender turmeric) and amba haldi (literally- green mango turmeric - it looks white like ginger, but has the sour taste of green mango and a mild flavour of fresh turmeric).

Locals regularly buy these items through winter and serve it up as a pickle with every meal as these 2 spices are supposed to help keep the cold of winter from affecting your body, and builds immunity and resistance against winter infections.

In its simplest form, a small piece of tender turmeric or amba haldi is chopped/julienned and sprinkled with salt and lemon juice just before serving on the table, with chilli powder being optional.

In its fancier form, it involves drying, tempering etc.


I personally prefer the flavour of the simple one, but for 2 people it doesn't make sense to keep chopping up a tiny piece daily, so after looking online and speaking to a few Gujarati friends I created a recipe that I liked.

Please Note :
While my photos will show that I used some of the lovely fresh red winter carrots in the pickle, from experience, I would now say that don't use carrots if you plan to store the pickle for more than a couple of days, as it turns soft.

Also, we preferred the flavour of amba haldi to the regular fresh turmeric, so I've upped the quantity in the recipe below.

The recipe that follows is what I've fine tuned based on experience and taste, but my pictures will show what I actually used, so don't let it confuse you. Follow the recipe words and don't worry about the quantities in the pictures, they are for illustrative purposes only. Also feel free to play around with the quantities to evolve something that suits your families taste buds.

Ingredients :

100 gms kaccha haldi / tender turmeric
100 gms amba haldi
5-30 green chillies (depending on spiciness and your families spice tolerance. I like mine spicy, so I used 30 spicy green chillies, if you want a mild flavour 5 green chillies is fine. But use the thin crispy style chillies - Indian chillies and Thai Birds eye chillies work well)
20-30 limes (you need the juice to completely cover the turmeric, so quantity will differ based on juiciness of limes, don't use limes that are very sour or bitter)
salt to taste - at least a tablespoon

Method:
Wash clean any mud on the surface, then scrape clean the kaccha and amba haldi and julienne it to around matchstick length.
Slit the green chillies lengthwise into 2 or 4 slices depending on thickness.
In a clean, dry glass / ceramic jar layer the turmeric and chillies, sprinkling a little salt at intervals.
Once the jar is full, squeeze the juice of the limes into the jar (taking care not to get any seeds in)
Cover with a thin cloth or tissue with a string or rubber band holding the mouth closed.
Keep it in the sun for 2 days, then give a nice stir or shake and refrigerate.

Take out as required and serve as a side with meals (2-6 sticks per person per meal is normal consumption)

Tips:
1. Make sure the bottle that you use has a plastic / glass or ceramic cover (not metal)
2. Make sure the bottle is completely dry before you use it and use a dry spoon each time you take anything out of the jar.
3. If a thin white film forms on top, it hasn't gone bad - its a normal phenomenon for pickling in brine (salt water), just bob the solid pieces below liquid level and give a stir and continue to use as normal.
4. Don't return pickle pieces back into the bottle once they have been exposed to air (if you serve it up for dinner in a plate and it doesn't get completely consumed), store it in a seperate box/bottle and use up before opening your main bottle again.
5. The fresh turmeric stains very very badly. My hands remained yellow and the nails looked jaundiced for at least 4-6 days. Watch out for your clothes. You may want to use gloves. I personally don't like to use gloves when prepping food, because my style of cooking enjoys the tactile sensations of the cooking process, If you do use gloves, use the thin ones that give you control and grip over the tiny turmeric pieces.
6. Choose the straightest and longest pieces of turmeric that you can find, it helps ease and hasten the skinning step.
7. I chopped off the tiny bumps and washed them and kept them in a little bowl in the fridge. I substitute one bump (smash before use) for powdered turmeric in my recipes, especially dhal.

Thursday, December 05, 2013

Recipe : Tamdi Bhaji / Laal Bhaji / Red Amaranth Greens - Vegan

My college friend May, from The Chef moved to Ahmedabad, a couple of months ago and its great fun to have her here in town, even though she stays a bit of a distance away from my place.

However, she recently discovered that the farmers on the little plot of agricultural land in front of her house, sell fresh produce  on a daily basis. The produce is the freshest ever, plucked in front of your eyes and washed and clean. So the next time I went to visit her, we went together to pick up some fresh veggies. Our haul for the day included methi bhaji, lauki (bottle gourd), brinjal, corriander, radish and tamdi bhaji.

When I brought the bhaji home, it was so clean, that it took me much less time than normal to clean it and it was so fresh and tasty.


Ingredients :
1 large bunch Tamdi Bhaji / Laal Bhaji / Red Amaranth chopped (about 500gms)
1 tsp oil
12-15 cloves garlic chopped (you can use less if you don't like the taste of garlic)
1 large onion chopped
1 large tomato chopped
6-12 green chillies slit in half or chopped (quantity depends on spice levels)
salt to taste
1 lime

Method:
Heat oil in a pan.
Add the chopped garlic and cook till it browns and starts to crisp up.
Now add the onions, tomatoes and green chillies.
Cook till soft.
Add the Tamdi Bhaji / Laal Bhaji / Red Amaranth and cook till done

Add salt to taste
Squeeze the lime juice over the bhaji, stir well and take off the fire.
Serve hot with dhal-chawal or rotis


Note: 
When cooking bhaji, a lot of people use just the tender stems, I used the thicker stems too, but I cut them up much finer than the leaves and added them with the tomatoes.
If the bhaji dries as you are cooking it, add a tsp of water at a time.

Wednesday, December 04, 2013

Recipe : Lebanese Cucumber with Minted Yoghurt

This dish is often served as an appetiser - a dip with pita bread or as part of a main course - sauce with kebabs. Similar to Indian Raita, what makes it unusual is the addition of fresh garlic in the dish. This dish can also be served as a side with Biryani. If you can't find Pita Bread, use any rolled breads you can find, the taste goes well with kulchas or khakhras too.


Ingredients :
2 medium cucumbers (roughly 250 gms)
200-250 ml thick yoghurt (curd / dahi)
1 tight handful finely chopped mint leaves (discard the stalks)
1 clove garlic crushed
1/2 tsp cumin / jeera powder
1 tbsp lime juice.
salt to taste

Method:
If your cucumbers have hard seeds, then cut the cucumber in half and scoop out the seeds.
Chop the cucumber flesh finely.

In a bowl, gently beat the yoghurt, so that it becomes smooth.
Add all the other ingredients and gently mix them all adjusting lemon juice and salt to taste.
Serve chilled as a dip or as a side.

Garnish with some cumin powder if you like.

Tuesday, December 03, 2013

Recipe : Bagdadi Restaurant's (Mumbai) Paneer Bhurji

Ever since I saw Chef Vikas Khanna's "Savour Mumbai - A Culinary Journey Through India's Melting Pot" at a bookshop, I've been itching to cook from it. My copy arrived on the 30th and since I had some Paneer in the fridge, the first recipe I decided to try was the Paneer Bhurji from Mumbai's Bagdadi Restaurant.


The recipe is extremely simple and quick to make. However, I used Goverdhans packaged paneer which turned out to be smooth and on the creamier side, but I think the taste and texture would be much better with fresh paneer or homemade paneer, especially on the day that you are upset that your paneer hasn't set well (tight).

This recipe reflects my higher heat, lower oil variation

Ingredients : 
300 gms fresh cottage cheese (paneer)
1 tsp oil (I used refined, 2 tbsp were recommended)
1/4 tsp cumin / jeera seeds
1 medium onion finely chopped
1 medium tomato finely chopped
6-8 green chillies finely chopped (original recommendation was 2)
1/4 tsp turmeric powder
1/4 tsp corriander powder
salt to taste
fresh coriander to garnish - finely chopped

Method :
Crumble the paneer roughly with your hands and keep aside.
Heat oil in a pan, add jeera seeds.
When they crackle, add onions and saute till they soften.
Add chillies and tomatoes and cook till tomatoes are soft and pulpy.
Now, add turmeric, corriander powders and salt and cook for 2 minutes or so.
Add paneer, mix well and cook until the water dries up.
Take it off the heat, garnish with corriander leaves and serve hot with dhal-chawal, rotis, parathas or on toast.

Monday, December 02, 2013

Recipe : Manglorean Snake Gourd (Podwole / Parwal) Sukke - Vegan

Snake Gourd / Podwole / Parwal is a lovely vegetable, that's low in calories and good for health.

This is a typical Manglorean Konkani way of preparing the vegetable. The distinctive taste comes from the Manglorean Vegetable Powder. But if you can't find Manglorean Vegetable Powder, you can use any other (red) Vegetable Powder.


Ingredients :
1/2 kg Snake Gourd / Podwole / Parwal
1 tsp coconut oil (regular oil will also be ok, coconut gives it a better flavour though)
1 tsp split black gram (urad dhal)
1 - 2 sprigs curry leaves (about 12 leaves)
2 - 4 dried red chillies
1 tsp mustard seeds
2 - 3 tbsp vegetable powder (to your spice levels)
salt to taste
1/2 coconut grated
pulp extracted from a marble sized ball of tamarind (or juice of lemon to taste)


Method :
Clean the Snake Gourd / Podwole / Parwal, you can use the skin, you don't need to peel it.
Cut it in half down the length and deseed.
Make thin slices.

In a pan, heat the oil.
Temper with urad dhal, curry leaves, red chillies and mustard seeds.
Now add the Snake Gourd / Podwole / Parwal and fry lightly.
Add the vegetable powder, cover and cook on a low flame.
If it dries up, add water a tsp at a time.
When the Snake Gourd / Podwole / Parwal is almost cooked, add the coconut and tamarind pulp/lime juice. Stir well and cover and cook till done.
Serve hot with rice and dhal or a side with any poli.


In the picture above, I've served it with appams and a chicken coconut curry.

Saturday, November 02, 2013

Recipe : Maharashtrian Chawli Usal / Lobia / Black Eyed Peas Curry - Vegan

I was bored of eating lobia / chawli / black eyed peas, the normal way that I make it (like a Punjabi channa masala style), I'd also been craving coconut for awhile (growing up, all 3 meals had coconut in some form or the other), so a Maharahtrian Konkani recipe seemed like the perfect fit. Spicy and coco-nutty.

This recipe is an amalgamation of remembered flavours (from my days living in Bombay & Pune) and some online help. I made the usal much thicker than is normally served in Marathi restaurants and ideally, I would have liked to cook the tomatoes much more, which I shall do the next time I repeat this dish (this recipe is corrected to add the tomatoes earlier, if you prefer your tomatoes slightly raw, add the tomatoes to the mix when adding the cooked beans).

It does take a little time to prepare and has multiple steps, but the final product is worth it.

Ingredients :
250gms lobia / chawli / black eyed peas (soaked overnight with a pinch of asafoetida)
2 tsp oil (Sesame/til or sunflower, don't use mustard)
3 medium onions

1.5- 2 inch ginger
6 - 10 garlic cloves
2 tbsp saunf / fennel seeds
1.5 tbsp corriander (dhania seeds) or  1 tbsp corriander powder
half a grated coconut - fresh or frozen (roughly about 1 cup)
2 tbsp dessicated coconut (this adds a second texture, but it is optional)
1 tomato chopped1 tsp turmeric powder
1-2 tsps red chilli powder
1 tsp Maharashtrian masala (goda or malvani) or any garam/vegetable masala (if you can't get your hands on the Maharashtrian masalas)
1 handful chopped corriander for garnishing

Method :
Pressure cook the soaked lobia / chawli / black eyed peas in enough water to cover + a little more.
You can either drain and discard the water or use the liquid when making the usal. I prefer to use it.

To make the masala, take the pan that you plan to cook the usal in (large enough)
Heat 1 tsp oil
Add 2 chopped onions and fry till translucent.
Add ginger and garlic and fry till they start releasing their aroma.
Add fennel seeds and coriander seeds (if using powders add them at the end in the blender, not now) and fry till they crisp up.
Add the fresh and dessicated coconut and roast on a low flame (coconut burns quickly, so keep an eye on it)

Turn off the heat when the coconut turns golden brown
Cool the mixture and then grind it fine (some restaurants serve it slightly grainy).

In the empty pan, heat the other tsp of oil.
Add the remaining chopped onion and tomato and fry till cooked.
Now add the ground masala and fry for a couple of minutes before adding the spice powders.

Stir well and add the pressure cooked lobia / chawli / black eyed peas.
If you are using the water that you cooked the chawli in (it may be black in colour, don't worry about it), be careful how much water you add to the pan.
Add salt to taste and bring it to a low simmer.
Keep cooking on a low flame until the ingredients are all cooked and the chawli has absorbed the flavours.
Garnish with chopped fresh corriander.

Serve hot with steamed rice or phulkas / rotis

LinkWithin

Related Posts with Thumbnails

ShareThis